A buyer from a fast-fashion brand once called me in mid-June demanding 10,000 custom star-shaped silicone hair clips for a back-to-school promotion in August. She had the design, the packaging, and the purchase order ready. What she did not have was a mold. Her previous supplier had quoted her six weeks just for the tooling, which would have pushed production into September and killed the entire promotion. I got the first mold sample in her hand in eleven days, and she sold out her inventory by the second week of August. Speed in mold-making is not a luxury. It is the difference between capturing a trend and explaining to your boss why the warehouse is full of dead stock.
The standard timeline to produce a custom silicone mold for hair clips ranges from 10 to 25 days for the initial mold fabrication, depending on the complexity of the design, the number of cavities required, and whether the mold requires intricate undercuts or multi-material overmolding features. This timeline covers the journey from your approved 3D design file to the first sample shot of silicone coming out of the mold. However, this is just the mold-making phase. A complete custom silicone hair clip project, from concept to shipping, involves several overlapping stages that a skilled project manager orchestrates to compress the total lead time without compromising quality.
In our Zhejiang factory, mold-making is a core competency, not an outsourced afterthought. We have a dedicated tooling room with CNC machining centers, EDM or Electrical Discharge Machining equipment, and a team of mold engineers who have spent years specializing exclusively in accessory-grade silicone molds. I want to walk you through exactly how long each phase takes, what factors can accelerate or delay the timeline, and how you can set up your project for the fastest possible turnaround without sacrificing the precision that makes a hair clip look and feel premium.
What Are the Key Stages in the Custom Silicone Mold Timeline?
Understanding the mold-making timeline requires understanding the sequence of operations. A custom silicone mold is not a single monolithic task. It is a chain of interdependent processes, and a delay in any one link pushes out the entire schedule. I have seen projects stall for a week because the client took too long to approve the mold flow analysis, and I have seen projects accelerate by five days because the design was clean and the feedback was instantaneous. Knowing these stages helps you plan your product launch calendar realistically and communicate effectively with your manufacturing partner.
The process breaks down into six distinct stages. Design review and DFM analysis, CNC rough machining, EDM fine detailing, polishing and surface finishing, mold assembly and first trial shot, and sample approval with mold adjustments. Each stage has a typical duration, and each stage presents opportunities for time savings if you and your factory work in tight coordination. Let me unpack the first two critical stages that set the foundation for everything that follows.
How does the design review and DFM analysis affect the timeline?
DFM stands for Design for Manufacturability. This is the first official step after you send us your design concept, and it can take anywhere from half a day to three full days depending on the complexity of the geometry. In this phase, our mold engineer examines your design and identifies features that will cause problems during molding. A sharp internal corner that will trap air and create bubbles. A wall thickness that varies too dramatically and will cause uneven cooling and warping. An undercut that will prevent the part from releasing from the mold without a complex slider mechanism. Each of these issues requires a conversation with you. We propose modifications that preserve the aesthetic intent but make the part moldable. If you approve our suggestions quickly, we move to the next stage within a day. If you need to consult your own design team or brand manager, the clock stops. This is one of the biggest variables in the timeline that you control directly. A well-prepared 3D CAD file with uniform wall thickness and appropriate draft angles can skip most of the DFM back-and-forth entirely. We provide a DFM checklist to all new clients that outlines the ideal parameters for silicone hair clip design. Using this checklist before you submit your design can shave three to five days off the total timeline. The injection molding design guidelines from industry leaders are a great starting point to understand the principles.
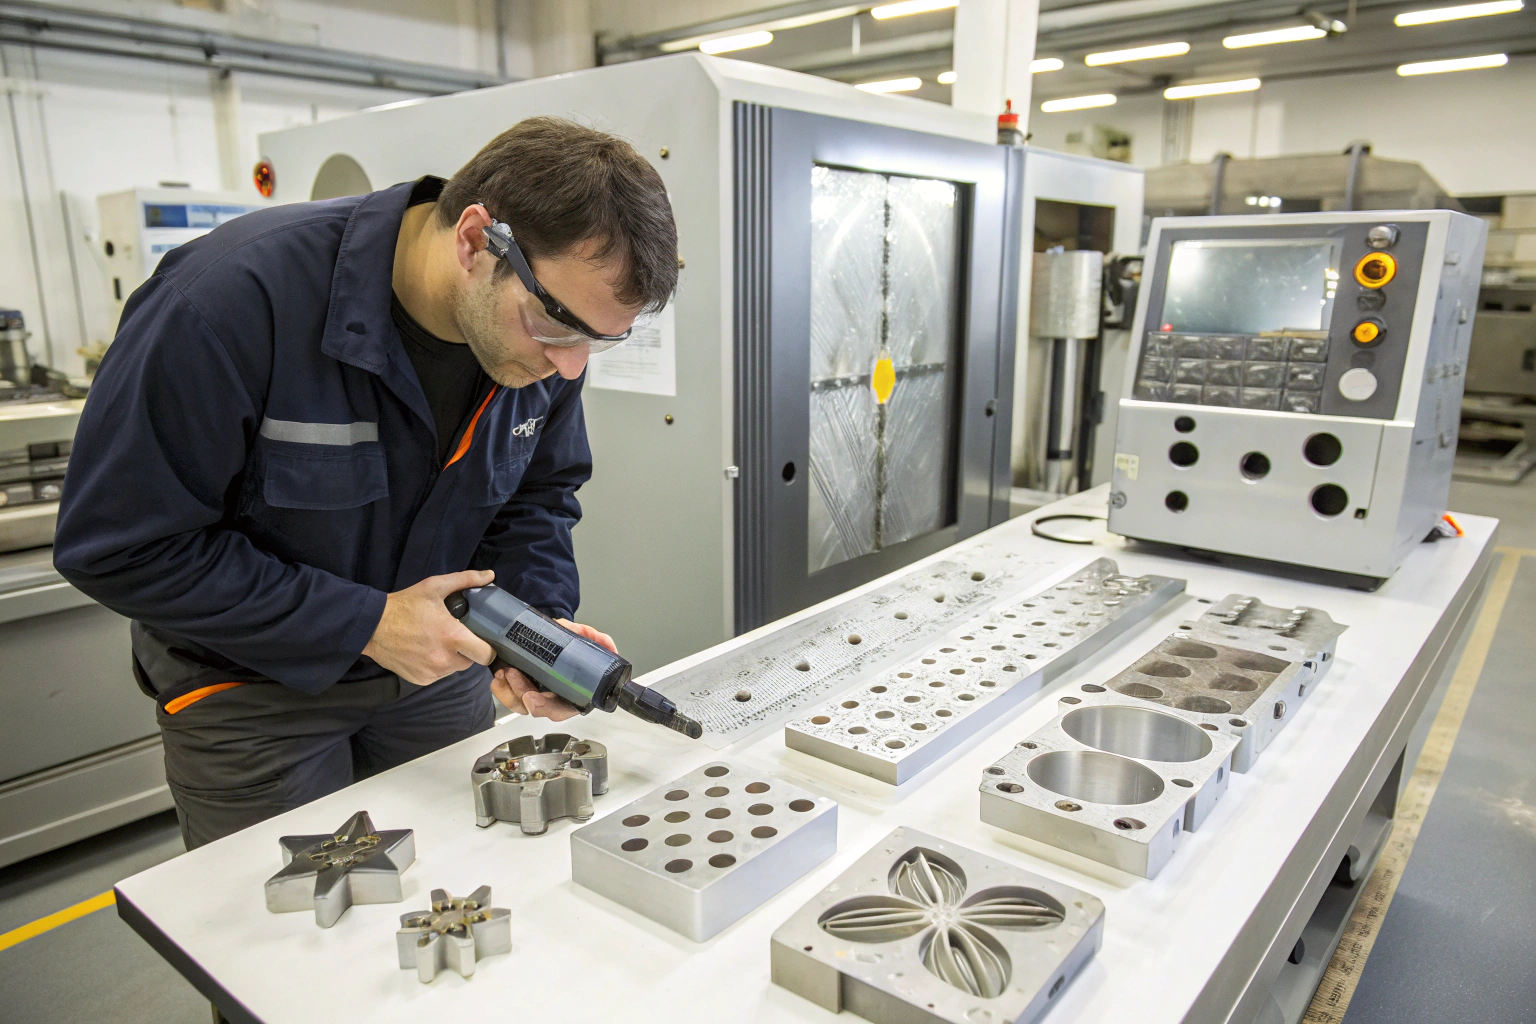
How long does CNC machining and EDM processing take for a hair clip mold?
Once the DFM is approved and the mold design is finalized, the physical cutting begins. The primary tool is a CNC or Computer Numerical Control machining center. A solid block of aluminum or steel is mounted on the machine bed, and a high-speed rotating cutting tool carves out the basic shape of the mold cavity. For a standard single-cavity hair clip mold, CNC rough machining typically takes two to four days. A multi-cavity mold with four or six identical impressions naturally takes longer because the machine must repeat the cutting path for each cavity. After CNC roughing, the mold moves to the EDM stage. EDM uses a precisely shaped electrode, usually made of graphite or copper, that creates an electrical spark to erode the steel in a controlled pattern. This process achieves the fine details that a rotating cutting tool cannot reach. Sharp corners, deep narrow ribs, and intricate surface textures like a glitter pattern or a faux leather grain are all created by EDM. This stage adds another two to five days depending on the intricacy of the texture. A smooth, simple hair clip shape might skip EDM almost entirely. A clip with a detailed butterfly wing pattern or a brand logo in micro-text will spend significant time in the EDM tank. The EDM machining process is slow by nature, but it is the only way to achieve certain geometries. We advise clients that if speed is the absolute priority, simplifying surface texture is the single most effective way to shorten the mold-making phase. A polished, glossy finish takes less mold processing time than a complex matte texture.
What Factors Can Speed Up or Delay Custom Mold Production?
I have produced molds in seven days, and I have produced similar molds in twenty-five days. The difference was never the machinery. The machines run at the same speed regardless of the project. The difference was always the clarity of the input and the speed of decision-making. A mold-making timeline is not just a factory schedule. It is a collaboration timeline, and both sides have the power to accelerate or sabotage it.
The factors that influence the timeline fall into two buckets. The technical factors are related to the physical complexity of the mold itself. The communication factors are related to how efficiently information and approvals flow between your team and ours. I want to break down the most impactful factors in each category so that you can enter your next project with a clear understanding of what drives the calendar and how to control it.
Why does part complexity impact mold fabrication time so significantly?
A simple, flat-backed hair clip with a smooth domed front is the fastest product to mold. The mold has a straightforward A-side and B-side with no moving parts. CNC machining handles the entire cavity, polishing is quick, and the first shot almost always releases cleanly. The timeline for this mold is the 10-day end of the spectrum. Add an undercut, and the timeline jumps. An undercut is a feature where the part geometry hooks inward, preventing the part from simply lifting out of the mold when it opens. Think of the clasp mechanism on a snap-clip or a decorative cut-out window in the clip body. These features require side-action slides or lifters built into the mold. A slide is a moving piece of steel that retracts sideways before the mold opens, releasing the undercut. Machining the slide, fitting it into the mold base, and tuning its movement adds two to four days. Overmolding adds another layer of complexity. An overmolded clip has a rigid plastic core for structure and a soft silicone outer layer for comfort. This requires two separate molds, a substrate mold for the rigid core and an overmold for the silicone, and a production process where the core is manually or robotically placed into the silicone mold. The tooling timeline effectively doubles. We also have to ensure the chemical bond between the rigid core and the silicone is perfect, which adds an extra round of material compatibility testing to the sample approval phase. Complex geometry is not bad. It creates a unique product that commands a higher price. But you must budget the time for it.
How does client approval speed affect the overall project timeline?
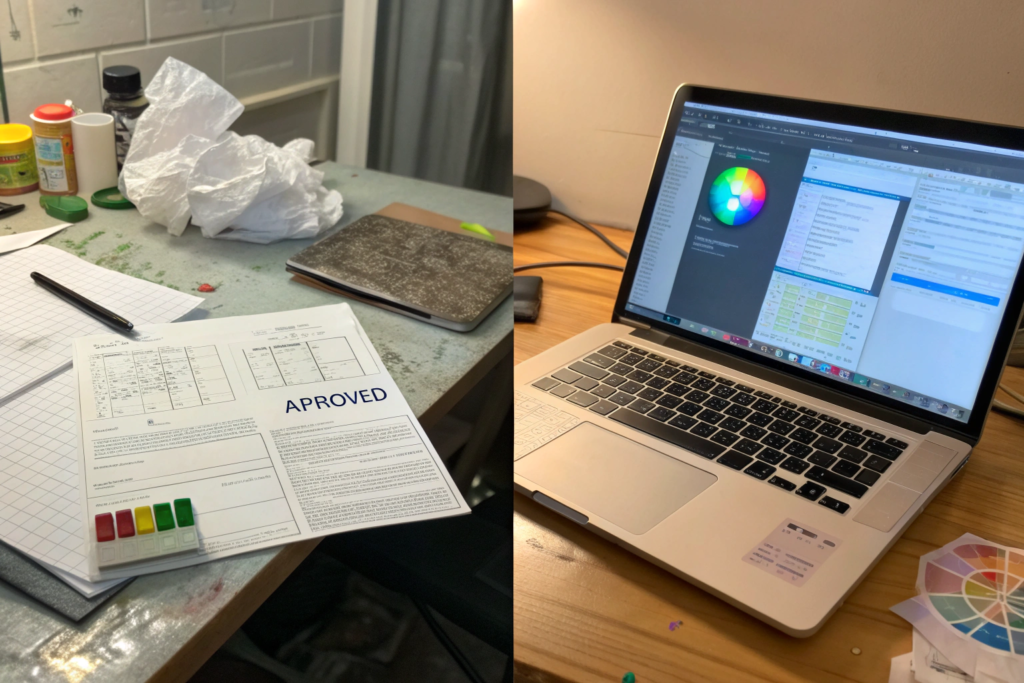
The single biggest timeline variable is not inside the factory. It is in your inbox. Every stage of the mold-making process has an approval gate. You approve the DFM report. You approve the mold flow simulation. You approve the first sample photographs we send you. If you respond within hours, the project flows without interruption. If you take three days to respond to each gate, the calendar swells by more than a week, and none of that time is productive manufacturing work. I recommend that my clients assign a single point of contact for the mold project and empower that person to make approval decisions without internal committee meetings. We also provide a shared timeline tracker that shows exactly where the project stands and where the next approval gate sits. This transparency eliminates the "I didn't know I needed to approve something" delay. Another common delay is color approval. We cannot mold the final production clips until you approve a physical color chip. Pantone numbers on a screen are not reliable because every screen renders color differently. We ship a physical silicone color swatch set by express courier. If you are in the United States, this takes two to three business days in transit. Factoring this shipping time into your plan prevents a last-minute panic. The most efficient clients combine approvals. When we send the first sample photo, they also confirm the color choice and the packaging specification in the same email. This parallel approval approach saves days.
What Is the Difference Between Prototype Molds and Production Molds?
Not all molds are built for the same purpose. A mistake I see new brand owners make repeatedly is ordering a production-grade, multi-cavity steel mold before they have validated their design in the market. They spend three weeks and significant tooling dollars on a mold that produces beautiful clips, only to discover that the shape does not sell or the size is slightly wrong for their target customer's hair type. They are stuck with a perfect mold for a product nobody wants.
The smarter path, and the one I advise all my startup and new-product clients to follow, is to separate the mold-making process into two distinct phases. A rapid prototype mold phase and a full production mold phase. Each serves a different purpose, has a different timeline, and costs a different amount. Understanding the trade-offs between them will save you money and prevent you from investing heavily in an unproven design.
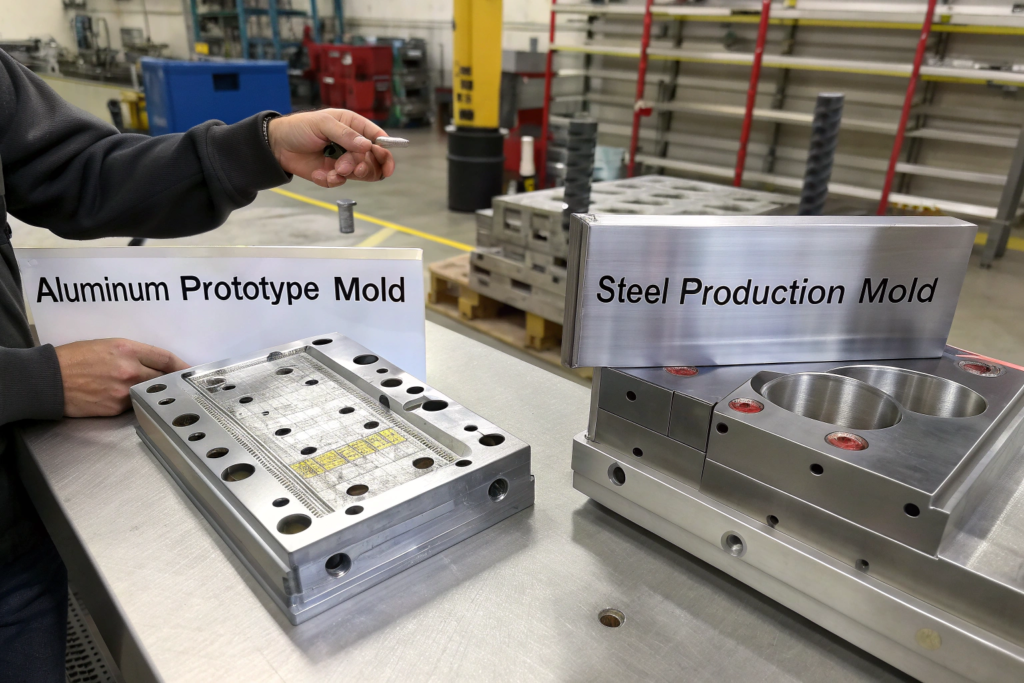
How fast can a prototype mold be made for market testing?
A prototype mold is built for speed and learning, not for longevity. We typically machine a prototype mold from aluminum rather than hardened steel. Aluminum cuts much faster than steel on the CNC machine, which reduces machining time by about thirty to forty percent. We usually build it as a single-cavity mold, producing one clip per machine cycle. The surface finish is functional but not fully polished to a mirror shine. The goal is to get a physical sample into your hand for evaluation. A prototype mold for a simple hair clip can be completed in as little as five to seven business days. This timeline allows you to receive physical samples, photograph them for your e-commerce listing, send them to influencers for feedback, and even run a small pre-sale campaign to gauge demand. The per-piece cost from a prototype mold is higher because it produces one clip at a time rather than four or eight simultaneously. But the tooling investment is significantly lower. This is the correct financial choice when you are testing three different clip shapes and do not know which one will be the winner. The rapid prototyping mold approach has launched countless successful hair accessory brands. It allows you to fail fast and cheaply on the designs that do not work and then invest confidently in production tooling for the design that does.
When should you invest in a multi-cavity production mold?
You are ready for a production mold when you have validated demand and you need to lower the unit cost to hit your margin targets at volume. A production mold is a different animal entirely. We machine it from hardened P20 or H13 tool steel, which can withstand hundreds of thousands of injection cycles without dimensional drift. We polish the cavity to a specified SPI or Society of the Plastics Industry finish standard, whether that is a high-gloss mirror finish or a precisely textured matte surface. Most importantly, we multiply the cavities. A four-cavity mold produces four identical clips every time the machine cycles. An eight-cavity mold produces eight. This multiplies the output rate and divides the labor and machine cost across more units. The timeline for a production mold extends to fifteen to twenty-five days depending on the cavity count and finish requirements. The steel itself takes longer to cut. The polishing is more labor-intensive. The mold base is larger and requires more complex water cooling channels to maintain consistent temperature across all cavities. We also build in a hot runner system that keeps the silicone in the sprue and runners molten between shots, eliminating the waste of cold runner scrap. This is an upfront investment that pays back through material savings over large production volumes. The decision to invest in a production mold should be based on a clear return on investment calculation. We help our clients run the numbers. If your validated sales forecast shows you will sell through 20,000 units in the next twelve months, a multi-cavity production mold almost always makes financial sense. The tooling cost is amortized over a large volume, and the lower per-unit cost drops straight to your bottom line.
How Do You Ensure the Mold Produces Consistent, High-Quality Hair Clips?
A mold that produces a perfect first sample is only half the story. The real test of a mold is whether it produces the ten-thousandth clip with the same precision as the first. Mold consistency separates professional tooling shops from amateur operations. A mold that drifts out of tolerance after a few thousand cycles is a mold that will generate customer returns, negative reviews, and chargebacks from your retail partners. The problem often does not reveal itself until the goods are already on the water.
We engineer consistency into the mold from the very beginning, and we verify it with a structured process qualification procedure. This is not guesswork. It is a disciplined methodology that we apply to every mold that leaves our tooling room, whether it is a single-cavity aluminum prototype or an eight-cavity hardened steel production workhorse. I want to share the specific steps we take to guarantee that your custom mold will deliver repeatable quality across the entire production run.
What is a mold flow analysis and why does it prevent defects?
Before we cut a single chip of steel, we run a computerized mold flow analysis on the 3D model of the mold cavity. This software simulates the injection process. It predicts exactly how the liquid silicone will flow into the cavity, where it will cool first, where it might trap air, and where the internal stresses will concentrate as the material solidifies. A common defect in silicone hair clips is a flow line, a visible line on the surface where two fronts of liquid silicone met and cooled before fully merging. The simulation predicts this location. We can then adjust the gate location, the injection speed, or the mold temperature to move the flow line to an inconspicuous area, like the back of the clip, or eliminate it entirely. Another critical defect is a short shot, where the silicone does not completely fill the cavity. This is often caused by trapped air that compresses and prevents the material from advancing. The mold flow analysis shows the air trap locations, and we add micro-vents to the mold design at precisely those points. These vents are channels just a few microns deep that allow air to escape but are too narrow for the viscous silicone to flow into. Fixing these issues in software takes hours. Fixing them by trial and error on a physical steel mold takes days and wastes material. Every mold we build for a client undergoes this simulation, and we share the analysis report with you. It demonstrates that we have thought through the physics of your part before we committed to cutting metal.
How does the production trial run and process validation work?
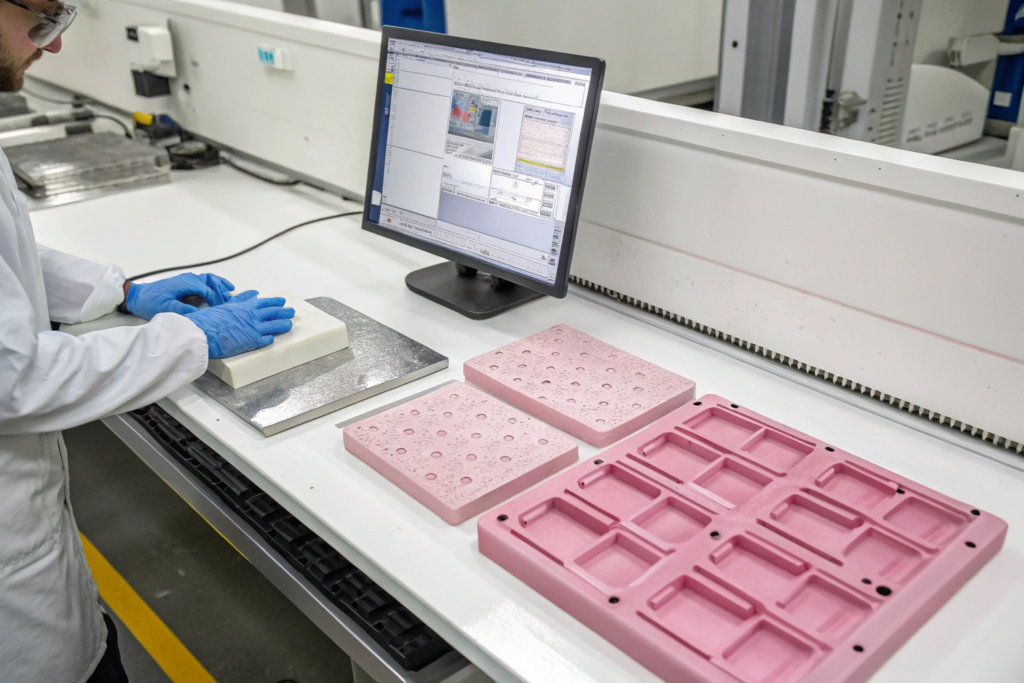
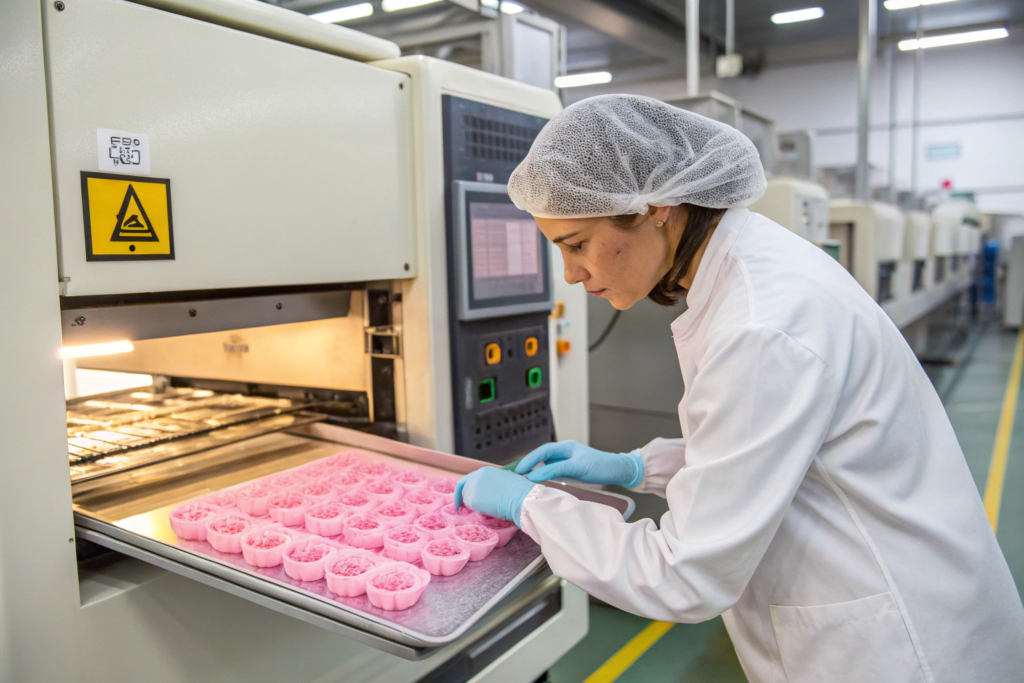
The mold is machined, polished, assembled, and mounted in the injection machine. The moment of truth is the first trial shot. We heat the mold to the specified operating temperature, inject the silicone, and open the mold. The first clips come out, and our quality team springs into action. They measure the critical dimensions against the approved 3D model using digital calipers and a video measurement machine for complex curves. They check the clip force for snap clips using a force gauge to ensure the closure feels satisfyingly secure but not too stiff for a child's fingers. They check the surface for any visual defects under bright, color-corrected lighting. This initial trial run typically produces fifty to one hundred pieces for evaluation. If any parameter is out of specification, we adjust the machine settings. Injection pressure, hold time, cooling time, and mold temperature are all variables we can tune. Once we achieve parts that meet all specifications, we lock in those machine parameters as the approved process. We then run a larger pilot batch, usually five hundred to a thousand pieces, to simulate continuous production conditions. We measure parts from the beginning, middle, and end of this run to verify that the mold maintains dimensional stability as it reaches thermal equilibrium. This production part approval process is modeled on the PPAP methodology used in the automotive industry. You receive a dimensional report and process parameter sheet with your sample approval submission. This documentation gives you objective evidence that your mold is production-ready, not just sample-ready.
Conclusion
The timeline to produce a custom silicone mold for hair clips is not a fixed number. It is a conversation between your design ambition, your market urgency, and your budget. A simple prototype mold can be in your hand within a week. A complex, multi-cavity production mold with overmolding and intricate textures takes three to four weeks. The total project timeline, including production of the finished clips, extends beyond that by the molding cycle time and the post-processing steps like trimming, quality inspection, and packaging.
What I hope you take away from this is that the timeline is largely controllable. You control the speed of design approval. You control the complexity of the geometry. You control whether you invest in a prototype mold first to validate the market before committing to the full production tooling. And you control the choice of partner. A factory with in-house mold-making, like ours in Zhejiang, eliminates the communication delays and the margin stacking that occur when the mold shop and the molding shop are separate companies in separate cities. Everything happens under one roof, managed by one project manager, accountable to one timeline.
If you have a custom silicone hair clip design that you are ready to bring to life, let's map out a realistic timeline together. Send us your concept, whether it is a fully detailed 3D CAD file or a sketch on a napkin. Our mold engineering team will provide a DFM analysis and a phased timeline with clear milestones so you know exactly when to expect your first samples and when your production order can ship. Our Business Director Elaine manages our mold-making and silicone production partnerships. She has shepherded hundreds of custom clip projects from concept to container. Reach out to her directly at elaine@fumaoclothing.com. Your mold is the foundation of your product. Let's build it right, and let's build it on time.