Creating children's felt hair clips combines creativity with practical craftsmanship, resulting in adorable accessories that are both safe and appealing for young ones. Many parents and small business owners seek to create these charming accessories but wonder about the best techniques and materials.
Making children's felt hair clips involves selecting child-safe materials, creating simple but appealing designs, using proper assembly techniques, and ensuring durability for active use. The process requires basic tools and materials, with an emphasis on safety considerations appropriate for children's accessories. With some practice, even beginners can create professional-looking felt hair clips that children will love to wear.
The appeal of handmade felt hair clips lies in their customization possibilities, gentle materials, and bright colors that appeal to children. Let's explore the complete process from material selection to finished product.
What Materials and Tools Do You Need?
Having the right materials and tools is essential for creating professional-looking felt hair clips that are safe and durable for children.
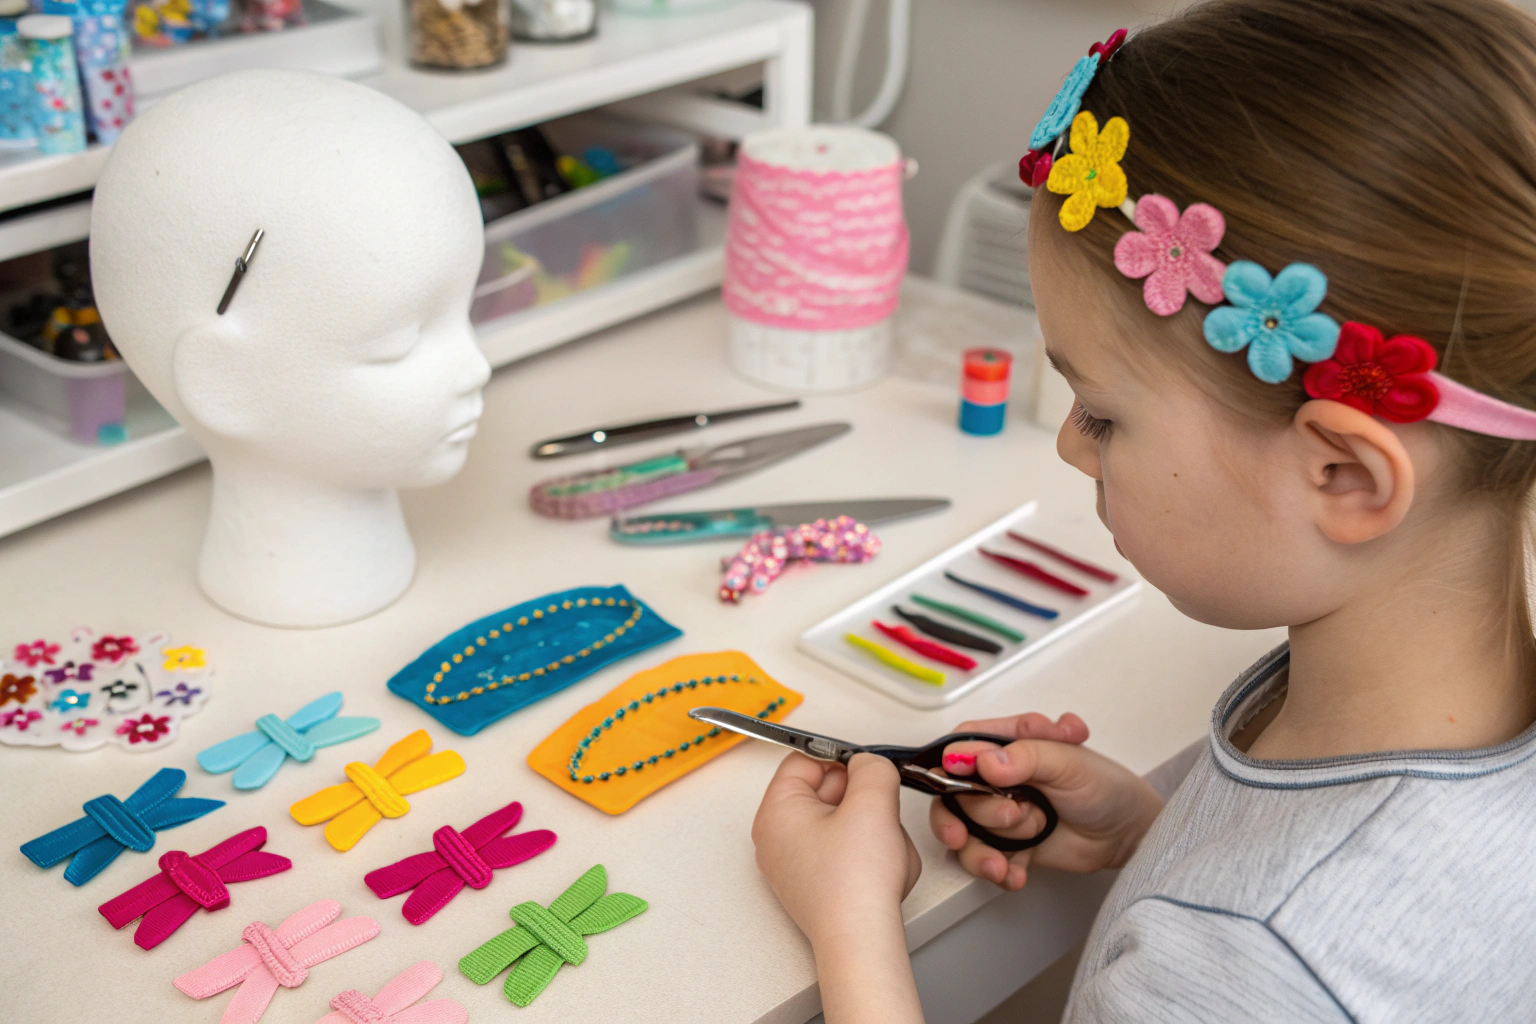
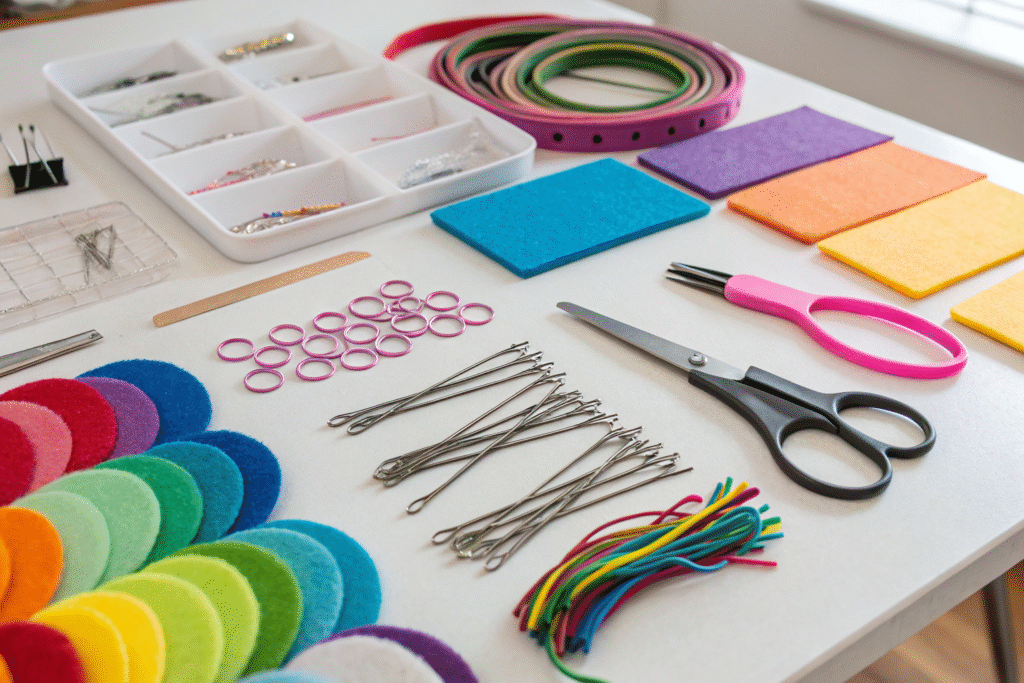
The basic materials needed include wool felt or premium synthetic felt in various colors, alligator hair clips (size 45-55mm is ideal for children), strong fabric glue specifically designed for felt, matching embroidery thread, and basic sewing needles. Optional but helpful materials include polyester fiberfill for adding dimension, assorted small decorations like safe buttons or beads (for older children), and fabric stiffener for certain designs. The quality of felt significantly impacts the final product—wool felt cuts cleaner, holds shape better, and lasts longer than craft-grade synthetic felt.
What Are the Essential Tools for Felt Hair Clip Creation?
The essential tools include sharp fabric scissors for clean cuts, embroidery scissors for detailed work, a self-healing cutting mat if using craft knives, disappearing ink fabric markers for tracing patterns, and a hot glue gun for quick assembly. For those planning regular production, a die-cutting machine with felt-compatible dies can dramatically speed up the process. The table below outlines the core tool requirements:
| Tool Type | Purpose | Importance Level |
|---|---|---|
| Sharp fabric scissors | Clean felt cutting | Essential |
| Embroidery needles | Decorating and assembly | Essential |
| Fabric glue | Securing layers | Essential |
| Hot glue gun | Clip attachment | Highly Recommended |
| Cutting mat | Protection and precision | Recommended |
How Do You Choose Child-Safe Materials?
Children's hair clip materials must prioritize safety above all considerations. Select felt that is colorfast and non-toxic, avoiding materials that might bleed when wet. Ensure all glues are non-toxic and washable once cured. Avoid small detachable decorations for young children who might put them in their mouths. When using beads or buttons, ensure they are securely attached and too large to be choking hazards. For children with sensitive skin, consider nickel-free hair clips and hypoallergenic materials throughout.
How Do You Create Basic Felt Shapes and Designs?
Simple but appealing designs work best for children's felt hair clips, with bright colors and recognizable shapes being most popular.
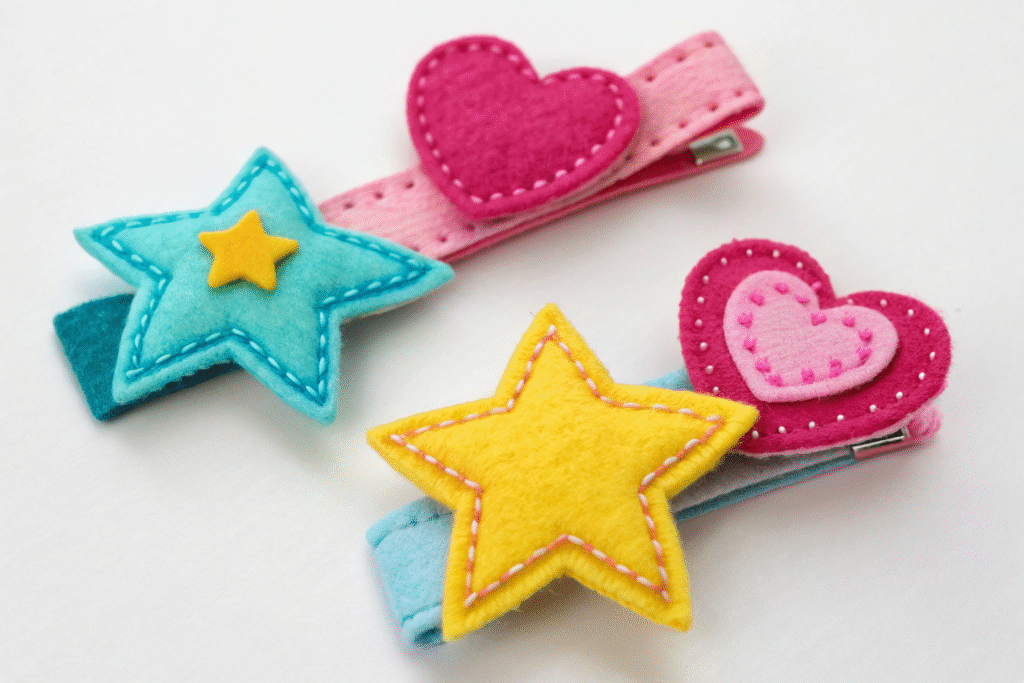
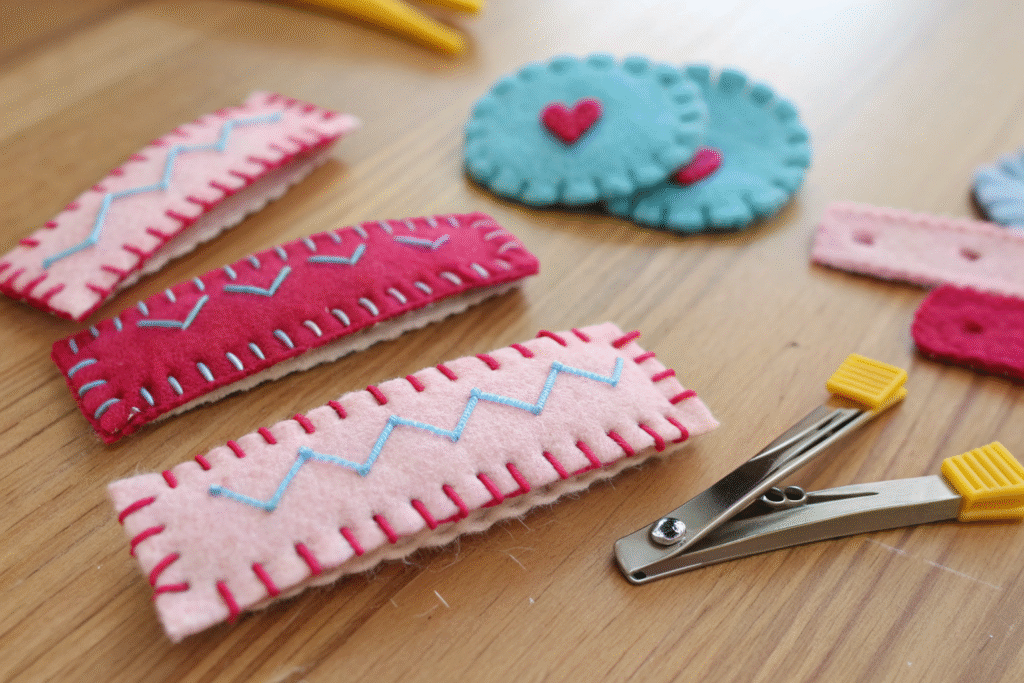
Begin with simple shapes that are easy to cut and assemble—flowers, animals, hearts, stars, and basic geometric shapes all work well. Create or find templates online, then trace them onto felt using disappearing ink markers. Cut carefully with sharp scissors, keeping edges clean and even. For beginners, start with single-layer designs before progressing to multi-layer creations that add dimension and interest. The most successful children's designs often feature contrasting colors, simple facial features on animal shapes, and elements that spark recognition and delight.
What Are Some Simple Design Patterns for Beginners?
Excellent beginner patterns include basic flowers with 5-8 petals, smiling clouds, simple hearts, bright stars, and friendly ladybugs. Animal faces like bears, bunnies, and cats work well when simplified to basic shapes with embroidered features. Seasonal shapes like pumpkins, snowmen, and Easter eggs offer holiday appeal. The key is starting with designs that require minimal pieces and straightforward assembly. Many creators develop a "signature style" once they master basic techniques, often focusing on a particular theme like woodland creatures or fairy tale characters.
How Can You Add Dimension and Interest to Flat Designs?
Several techniques can transform flat felt pieces into dimensional creations. Layering different colored felt pieces creates visual depth—for example, adding a smaller contrasting circle centered on a larger circle. Simple embroidery stitches like French knots for eyes, straight stitches for whiskers, or blanket stitches around edges add texture and detail. Light stuffing with polyester fiberfill creates a pleasantly plump effect, particularly effective for animal designs. Mixing felt types—such as combining standard felt with glitter felt or wool felt—adds visual interest through texture variation.
What Assembly Techniques Ensure Durability?
Proper assembly techniques ensure felt hair clips withstand children's active use while maintaining their appearance through multiple wearings.
The most durable felt hair clips use a combination of sewing and gluing techniques. For layered designs, use small, neat whip stitches or blanket stitches around edges with matching embroidery floss. When attaching decorative elements like smaller felt pieces or safe embellishments, use fabric glue followed by a few securing stitches if possible. The critical attachment point—where the felt creation meets the hair clip—requires the strongest connection. Here, a combination of strong fabric glue and strategic stitching creates a bond that survives tugging and active play.
What Is the Strongest Method for Attaching Felt to Clips?
The most reliable method involves creating a felt "sandwich" around the clip base. Cut a rectangular piece of felt slightly wider than the clip and long enough to cover the gripping area. Glue this piece to the bottom of the clip, then glue your decorative felt piece on top, ensuring the clip's mechanism remains functional. For additional security, add a few hand stitches through all layers at the front and back of the clip where stress is greatest. This method distributes pressure across a larger surface area, preventing the common failure point of decorations detaching from clips.
How Can You Reinforce High-Stress Areas?
High-stress areas include anywhere the clip might be repeatedly opened and closed, attachment points between different felt pieces, and any protruding elements that might catch on clothing or hair. Reinforce these areas with extra stitching, particularly using strong backstitches at points of tension. For designs with moving parts or separate elements, consider using fusible interfacing between felt layers to add stability. Avoid designs with long, thin projections that might bend or tear with use, instead opting for compact shapes with good structural integrity.
How Do You Add Professional Finishing Touches?
Attention to finishing details transforms homemade-looking felt clips into professional-quality accessories.
Professional finishing begins with neat edges—if your cutting wasn't perfect, gently sand felt edges with fine-grit sandpaper to smooth irregularities. Check that all glue is neatly applied without excess seeping from edges. Ensure threads are securely tied off and trimmed close to the work. For an especially polished look, consider applying a fabric protectant spray specifically formulated for felt, which helps repel moisture and stains. Finally, give each clip a thorough inspection from all angles, checking for any loose elements, glue strings, or imperfections.

What Packaging and Presentation Enhance Perceived Value?
Presentation significantly impacts how felt hair clips are perceived. For gifts or sales, consider simple packaging like clear cellophane bags tied with coordinating ribbon, which protects while allowing full visibility. Attaching a small care card with instructions ("Spot clean only," "Store flat") adds professionalism. For sets, coordinate colors or themes, and present in small boxes or organza bags. Including the child's name on packaging for custom orders creates a personal touch that customers appreciate. Even simple presentation touches like tying with curling ribbon in complementary colors elevates the overall appearance.
How Can You Ensure Consistency Across Multiple Pieces?
Creating consistent felt hair clips requires establishing standards and systems. Use templates rather than freehand cutting for identical shapes. Create a color palette that works well together and stick to it for cohesive collections. Measure glue amounts rather than applying randomly. Develop a production process where you complete all cutting first, then all decorating, then all assembly, rather than making one complete clip at a time. The table below shows a sample production workflow:
| Production Stage | Activity | Quality Check |
|---|---|---|
| Preparation | Cut all pieces for multiple clips | Verify size and shape consistency |
| Decoration | Embroider details on all pieces | Check stitch consistency |
| Assembly | Layer and glue components | Ensure proper alignment |
| Final Attachment | Secure all pieces to clips | Test clip function and security |
Conclusion
Creating children's felt hair clips is an enjoyable craft that yields charming results perfect for gifts, personal use, or small business ventures. By selecting quality materials, mastering basic techniques, paying attention to durability, and adding professional finishing touches, you can create hair accessories that children will adore and parents will appreciate. The process offers endless opportunities for creativity while developing skills that can be applied to other felt crafts. With practice, you'll develop efficiency and consistency in your creations.
If you're interested in producing felt hair clips commercially or need manufacturing support for larger quantities, our facility specializes in creating child-safe accessories with the charm of handmade quality. We combine artisan techniques with efficient production methods. Contact our Business Director Elaine today at elaine@fumaoclothing.com to discuss how we can help you create beautiful felt hair clips for the children's market.