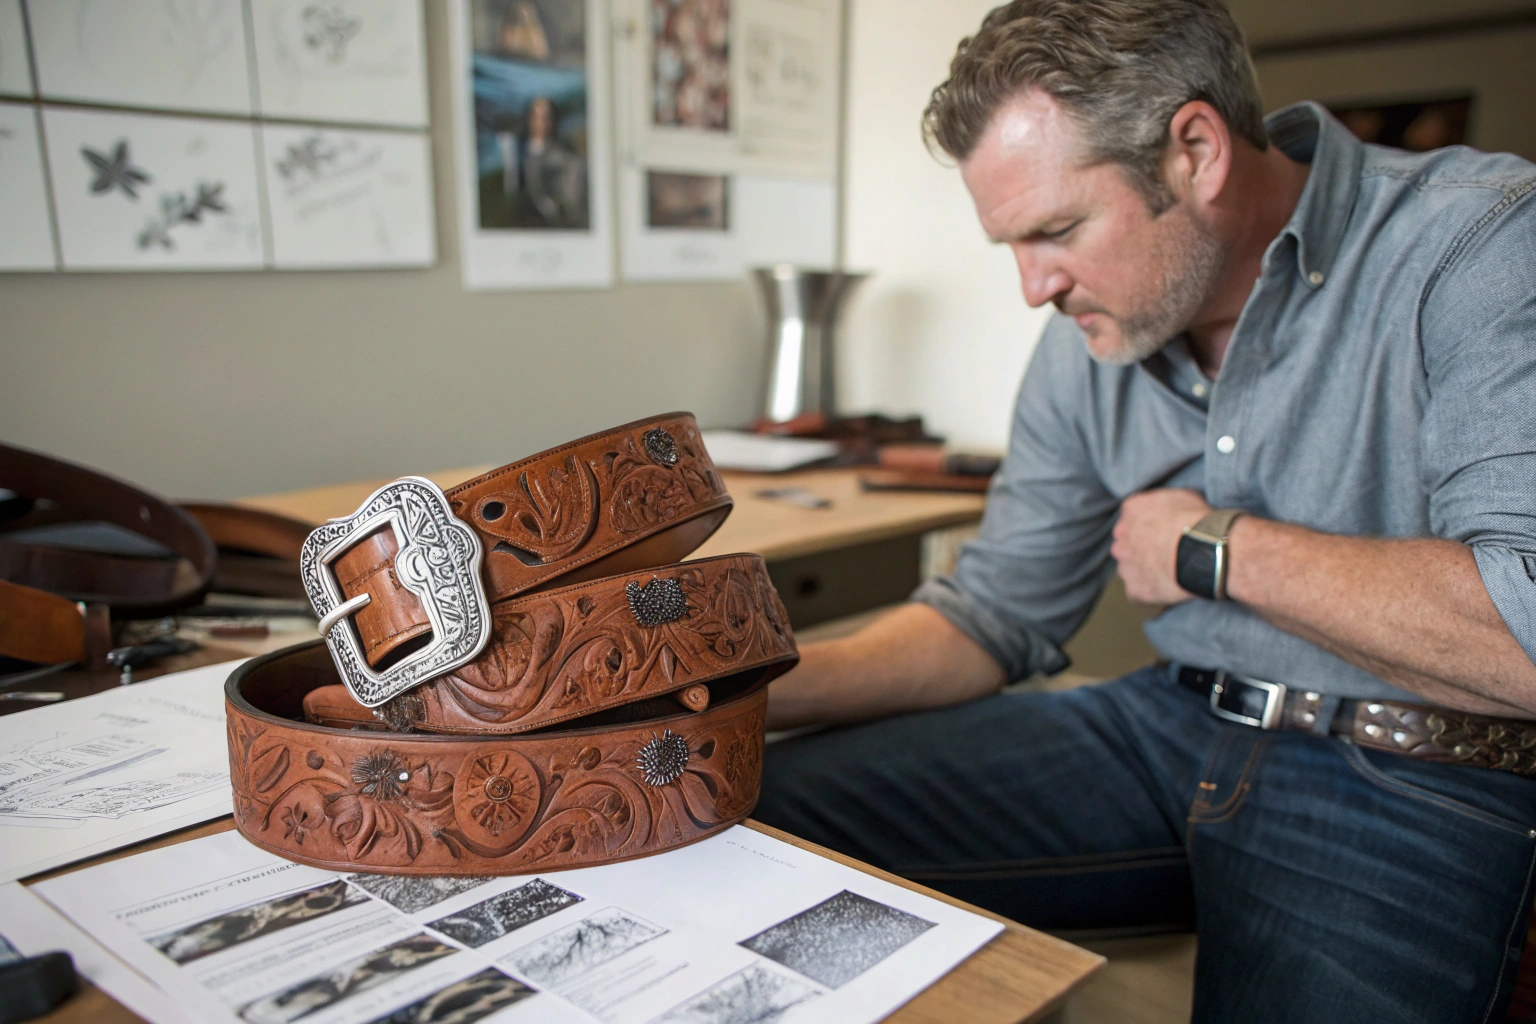
A creative director from a Texas-based western wear brand sat in my showroom two years ago, flipping through a stack of physical belt samples with growing frustration. His brand was launching a new line of carved leather belts with intricate floral tooling patterns and engraved silver buckles. He had been working with a traditional belt factory that produced physical samples for every design iteration. Each round of samples took three weeks and cost hundreds of dollars in tooling, leather, and shipping. He had gone through four rounds of samples on a single buckle design, and he still was not happy with the proportions. He was eight weeks into the development process, his launch deadline was looming, and he had nothing finalized. He asked me, "Is there a faster way to see what a belt is going to look like before anyone cuts a piece of leather or pours a single ounce of metal?"
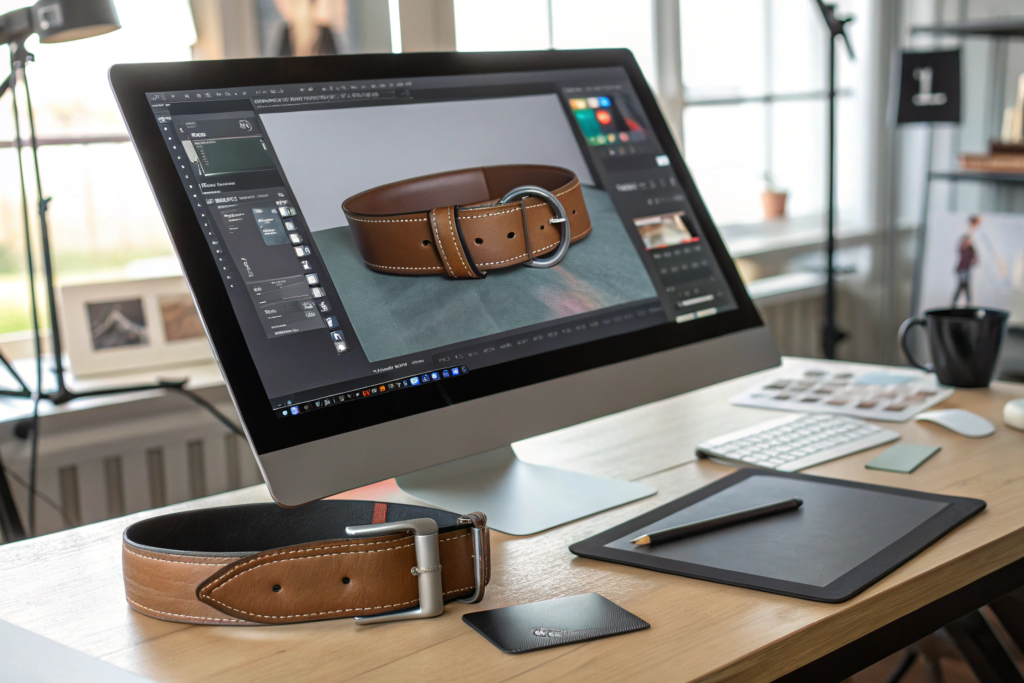
I took him into our design studio and showed him our 3D rendering workflow. On a large monitor, our 3D designer pulled up a digital model of his belt. The leather strap was a rich, cognac brown with a realistic pebble grain texture. The buckle was a polished silver with his brand’s logo precisely engraved. The stitching was a contrasting cream thread with the correct stitch density. The designer rotated the belt in real time. He zoomed in on the buckle. He changed the leather color from cognac to black with a single click. He swapped the buckle from silver to antique brass. He adjusted the width of the strap from 35 millimeters to 40 millimeters. My client sat in silence for a full minute, then said, "This changes everything."
Our design team creates 3D renderings of new belt designs using a combination of 3D modeling software, physically-based rendering engines, and a library of digitized materials and components. The process begins with the creation of a precise 3D model of the belt. The strap, the buckle, the keepers, the stitching, and any decorative elements are modeled using CAD software. The geometry is built to exact production specifications, so the rendering is not just a pretty picture. It is a dimensionally accurate representation of the product that will be manufactured. Materials and textures are applied using a physically-based rendering, or PBR, workflow. The leather surface is defined by its color, its roughness, its bump texture, and its reflectivity. The metal buckle is defined by its base color, its metallic property, and its surface finish, polished, brushed, or matte. These material properties are based on real-world measurements of physical material samples, ensuring that the digital leather looks like real leather and the digital metal looks like real metal. The 3D model is placed in a virtual lighting environment that simulates a photography studio or a retail setting. The rendering engine calculates how light interacts with every surface, creating photorealistic images with accurate shadows, reflections, and highlights. The result is an image that is often indistinguishable from a photograph of a physical belt. The 3D rendering allows the designer and the client to see the belt from any angle, in any color, with any material combination, in minutes rather than weeks. It is the single most powerful tool we have for accelerating the design and approval process.
The transition from physical sampling to 3D rendering has been the most significant efficiency improvement in our product development process in the past decade. A physical belt sample still has an important place. It confirms the hand feel, the weight, and the physical presence of the product. But for the iterative design process, for exploring color variations, for making proportion adjustments, and for getting initial client approval, 3D rendering is faster, cheaper, and more flexible. At AceAccessory, we have invested in the software, the hardware, and the skilled personnel to make 3D rendering a core part of our design service. Let me walk you through exactly how we do it.
What Software and Tools Are Used for Belt 3D Modeling
The foundation of our 3D rendering capability is a suite of professional software tools and a library of digital assets that we have built over years. The software is industry-standard, the same tools used by automotive designers, watchmakers, and furniture manufacturers to create photorealistic product visualizations. The digital asset library is proprietary. It contains hundreds of digitized materials, leathers, metals, fabrics, stitches, that have been scanned and calibrated from physical samples. The combination of professional software and an accurate material library is what makes our renderings realistic enough to be used for design approval.
Our 3D belt modeling workflow uses a combination of parametric CAD software, polygon-based 3D modeling software, and a dedicated rendering engine. For the buckle and hardware, we use parametric CAD software such as SolidWorks or Fusion 360. These programs create precise, dimensionally accurate solid models. The buckle geometry is built from the technical specifications, the overall dimensions, the curve radii, the hole positions, and the engraving depth. The parametric model can be easily modified. The designer can change a dimension, and the entire model updates automatically. For the leather strap, stitching, and organic details like carved tooling patterns, we use polygon-based modeling software such as Blender or ZBrush. These programs are designed for creating complex, organic shapes. The leather strap is modeled as a flexible surface with thickness. The stitching is created using a curve tool that places individual stitch polygons along a defined path. The carved tooling pattern is sculpted digitally, simulating the depth and texture of hand tooling. The 3D models from the CAD software and the polygon software are combined in a scene assembly program, where the buckle is attached to the strap, the keepers are positioned, and the overall composition is finalized. The completed 3D model is then imported into a dedicated rendering engine such as KeyShot or V-Ray. The rendering engine is specialized software that simulates the physics of light. It calculates how light rays bounce off every surface, creating realistic reflections, shadows, and global illumination. The rendering engine uses the PBR material definitions to accurately simulate the appearance of leather, metal, and thread. The final output is a high-resolution, photorealistic image.
The choice of software depends on the specific task. The CAD software provides the precision. The polygon software provides the organic flexibility. The rendering engine provides the photorealism. Our 3D designers are cross-trained on multiple platforms and can choose the best tool for each element of the belt design. Let me detail the two most important software categories.
How Does CAD Software Create Accurate Buckle Models?
CAD, Computer-Aided Design, software is the tool for creating dimensionally precise 3D models of the buckle and other hardware components. A buckle is a mechanical object. It has specific dimensions that must be accurate for it to function correctly and to be manufactured. The prong must fit through the belt holes. The buckle frame must accommodate the strap width. The attachment points for the rivets or screws must be correctly positioned. CAD software is built for this kind of precision. The designer begins with a 2D sketch of the buckle profile. The sketch is fully dimensioned, with the overall width, the height, the thickness, and the radius of each curve specified. The sketch is then extruded into a 3D solid. Features are added. The prong hole is cut. The recess for the strap attachment is machined. The decorative engraving is modeled by creating raised or recessed surfaces. The CAD model is parametric. This means that each dimension is a variable that can be changed. If the designer wants to see the buckle at 40 millimeters wide instead of 38 millimeters, they change the width variable, and the entire model rebuilds instantly. The holes, the curves, and the engraving all adjust proportionally. This parametric capability is what makes CAD so powerful for design iteration. The designer can explore dozens of size variations in minutes. The CAD model also contains the manufacturing data. The same 3D model used for the rendering can be exported as a file format that is used by CNC milling machines or 3D printers to create the physical mold or the prototype. The rendering and the manufacturing are derived from the same digital source, ensuring that the physical buckle will match the digital rendering exactly. The CAD software we use, primarily SolidWorks, is the standard in the fashion hardware industry. Our designers are experienced in creating buckle models that are both aesthetically refined and technically accurate for production.
What Rendering Engine Creates the Most Realistic Leather Textures?
The rendering engine is the software that transforms the 3D model into a photorealistic image. It simulates the physics of light. The most realistic leather textures are achieved using a PBR, Physically-Based Rendering, engine. PBR is a rendering approach that uses real-world physics to calculate how light interacts with surfaces. The material properties are defined by measurable parameters. The base color, also called the albedo, defines the color of the surface. The roughness defines how smooth or rough the surface is, from a mirror polish, roughness 0, to a completely matte, diffuse surface, roughness 1. The metallic property defines whether the surface is a metal, where reflections are tinted by the base color, or a non-metal, where reflections are white. The normal map or bump map defines the fine surface texture, the grain of the leather, the weave of the thread, and the pores of the skin. The leather material in our rendering engine is created by digitizing a physical leather sample. We use a flatbed scanner or a specialized material scanner to capture the color, the roughness, and the surface texture of the real leather. The scanned data is processed into a set of texture maps that are applied to the 3D model. The rendering engine uses these maps to calculate how the digital leather will look under any lighting condition. The leather will have the correct color, the correct sheen, and the correct grain texture. The rendering engine we use, primarily KeyShot, is specifically designed for product visualization. It has a library of preset materials, lighting environments, and camera settings that are optimized for creating realistic product images. It also has a feature called real-time rendering, which allows the designer to see the changes to the model, a color change or a material swap, instantly without waiting for a long render calculation. The combination of PBR materials and a dedicated rendering engine is what produces belt images that are indistinguishable from photographs.
How Are Realistic Material Textures Applied to Belt Models
The realism of a 3D belt rendering depends entirely on the quality of the materials applied to the model. A perfectly modeled belt with poor materials will look like a plastic toy. A simple model with excellent materials can look almost real. The materials define the color, the texture, the shininess, and the tactile quality of every surface. Our material library is the result of years of scanning, calibrating, and testing. Every leather we use, every metal finish, every thread color, has been digitized and stored in the library. When a designer creates a new belt rendering, they do not have to guess at the material properties. They simply select the approved material from the library, and it is applied to the model with physical accuracy.
Realistic material textures are applied to belt models using a Physically-Based Rendering workflow and a library of digitized, calibrated materials. The foundation is the material scan. A physical sample of the leather, metal, or fabric is scanned using a high-resolution flatbed scanner or a specialized material scanner. The scan captures the base color, the albedo map, which is the flat color of the material without any lighting information. It captures the surface roughness by analyzing the micro-variations in the surface. A smooth, polished surface has low roughness. A textured, grainy surface has high roughness. It captures the surface texture, the normal map, by using multiple light sources to measure the three-dimensional bumps and pores of the surface. The scanned data is processed in an image editing program to create seamless, tileable texture maps. The texture maps are imported into the rendering engine’s material editor. The base color map is connected to the diffuse color channel. The roughness map is connected to the roughness channel. The normal map is connected to the bump channel. Additional maps, such as a specular map for controlling reflections or a displacement map for creating deep, three-dimensional relief, can be added for even greater realism. The material properties are calibrated by rendering a test scene and comparing the digital material to the physical sample under controlled lighting. Adjustments are made until the digital material is a perceptual match to the physical material. The calibrated material is saved to the material library with a descriptive name and the supplier’s reference code. The next time a designer needs that leather, it is a single click away.
The material library is a living asset. It grows with every new product development project. A new leather sourced for a client’s collection is scanned and added to the library. Over time, the library becomes a comprehensive digital archive of our material capabilities. Let me detail the two most important material types.
How Do You Digitize Leather Grain and Stitching for Renderings?
Leather grain is the visible surface texture of the leather, the pattern of pores, wrinkles, and fine lines that gives leather its character. Digitizing this grain accurately is essential for a realistic rendering. The process begins with the selection of a high-quality leather sample. The sample should be representative of the leather that will be used in production, with a consistent grain pattern and no surface defects. The sample is scanned on a high-resolution flatbed scanner at a resolution of 1200 to 2400 dots per inch. The scanned image captures the color variation and the subtle shadows created by the grain texture. The scanned image is processed to remove the overall color and to isolate the grain texture. This is done using frequency separation, a technique that separates the image into a low-frequency color layer and a high-frequency texture layer. The high-frequency layer is used to create the bump map or the normal map. The bump map is a grayscale image where lighter pixels represent raised areas and darker pixels represent recessed areas. The normal map is a more sophisticated version that encodes the three-dimensional direction of each surface point. The normal map produces more realistic lighting effects. The bump map or normal map is applied to the 3D model. The rendering engine uses the map to simulate the way light interacts with the grain texture. The light catches the raised areas and creates shadows in the recessed areas, just as it does on the physical leather. Stitching is digitized using a similar process. A sample of the stitching, a straight run of the specified thread on the specified leather, is scanned at high resolution. The scan captures the texture of the individual thread filaments and the way the thread sits on the leather surface. The stitching texture is applied along the stitch path on the 3D model. The 3D designer uses a curve tool to define the path of the stitching, matching the stitch distance from the edge and the stitch density. The rendering engine places the stitch texture along this path, creating a realistic representation of the sewn seam.
Can 3D Renderings Accurately Show Different Metal Finishes?
Yes, 3D renderings can accurately show different metal finishes, from a highly polished mirror chrome to a matte, sandblasted brass, with a level of realism that is often indistinguishable from a photograph. The key is the PBR material definition for the metal. For a metal material, the base color defines the color of the reflections. A gold metal has a warm, yellow base color. A silver metal has a neutral, grey base color. A copper metal has a reddish-orange base color. The metallic property is set to 1, indicating that the material is a pure metal. The roughness defines the finish. A perfectly polished mirror finish has a roughness of 0. The reflections are perfectly sharp, like a mirror. A brushed finish has a low roughness, around 0.1 to 0.2. The reflections are slightly blurred in the direction of the brushing. A matte, sandblasted finish has a higher roughness, around 0.3 to 0.5. The reflections are soft and diffuse. An antique, oxidized finish has a higher roughness and a non-uniform base color, with darker areas in the recesses and lighter areas on the raised surfaces. The antique effect is achieved by using a combination of the base color map and the roughness map. The base color map has darker tones in the recessed areas, simulating the accumulated patina. The roughness map has higher roughness in the recessed areas, simulating the slightly rougher texture of the oxidized metal. The rendering engine calculates the reflections based on these material properties. The environment, the virtual room that is reflected in the metal surface, is also important. A studio lighting environment with soft, diffused lights creates gentle, elegant reflections. A high-contrast environment with bright point lights creates dramatic, sharp reflections. The designer can adjust the environment to suit the desired presentation style. The 3D rendering of metal finishes is so accurate that clients often use our renderings for their initial buyer presentations and for their e-commerce product images, without waiting for a physical sample.
How Do 3D Renderings Speed Up the Belt Approval Process
The traditional belt design approval process is slow because it is constrained by the physics of making physical objects. A change to the buckle requires the mold to be modified or a new mold to be made. A change to the leather color requires a new hide to be dyed and finished. A change to the stitching requires a new sample to be sewn. Each physical iteration takes time and costs money. The 3D rendering process breaks this constraint. Changes are made digitally, in real time, at zero material cost. The approval process that used to take weeks and cost thousands of dollars can now be completed in days, or even hours, for a fraction of the cost.
3D renderings speed up the belt approval process by enabling real-time design iteration and virtual sampling. The client sees the first 3D rendering, perhaps of the belt in cognac leather with a polished silver buckle. The client likes the overall design but wants to see it in black leather, with an antique brass buckle, and with a slightly wider strap. The 3D designer makes these changes in the rendering software. The leather material is swapped from the cognac preset to the black preset with a single click. The buckle material is swapped from polished silver to antique brass with another click. The strap width is adjusted by changing a parameter in the CAD model. The updated rendering is produced. The total time elapsed is perhaps thirty minutes. The client reviews the new rendering. They are almost happy, but they want to see the antique brass buckle with a slightly more matte finish. The roughness parameter is adjusted. The rendering is updated. Another ten minutes. The client approves the design. The entire iterative approval process, which would have taken six to eight weeks and three or four rounds of physical samples, has been completed in a single afternoon. The cost of the physical samples, the tooling, the leather, the shipping, has been avoided. The final, approved 3D rendering serves as the visual specification for the production order. The 3D model is used to generate the technical drawings and the mold files. The production team has a clear, unambiguous visual reference of exactly what the client has approved. The virtual sampling process is faster, cheaper, and more flexible than physical sampling. It allows the client to explore more design options, to make more informed decisions, and to bring products to market faster.
The virtual sampling process does not eliminate the need for a final physical sample. A pre-production sample is still produced before the full production run, to confirm the hand feel, the weight, and the physical details that a rendering cannot fully convey. But the virtual sampling eliminates the early, iterative rounds of physical sampling that consume the most time and money. Let me detail the two most important speed benefits.
How Many Design Variations Can Be Reviewed in a Single Session?
The number of design variations that can be reviewed in a single 3D rendering session is practically unlimited. The constraint is not the time to produce the renderings, but the client’s ability to absorb and evaluate the options. A skilled 3D designer can produce dozens of variations in a single workday. The designer can prepare a rendered grid that shows the belt in every combination of leather color and buckle finish. Five leather colors times four buckle finishes equals twenty variations, all presented in a single, organized image. The client can compare all twenty options side by side, evaluating the combinations and eliminating the ones that do not work. The designer can zoom in on a specific detail, the engraving on the buckle, the stitch pattern, and show variations of that detail. Three different engraving depths, four different stitch colors. The designer can produce an animated turntable video that shows the belt rotating through 360 degrees, allowing the client to see the belt from every angle and to evaluate the proportions and the overall silhouette. The sheer volume of visual information that can be generated in a short time is transformative. It enables a much more thorough exploration of the design space. The client can be confident that they have seen all the viable options and that the design they have chosen is the best possible version. This thoroughness was simply not possible with physical sampling. The cost and time constraints limited the client to two or three variations. With 3D rendering, the client can explore dozens of variations, leading to a better, more considered final design.
Can 3D Renderings Replace Physical Samples for Buyer Presentations?
3D renderings are increasingly used to replace physical samples for initial buyer presentations, particularly for large retail accounts and for online product launches. The quality of the renderings is now sufficient that many buyers are comfortable making purchasing decisions based on digital images, provided the images are from a trusted source and are known to be accurate representations of the final product. For a brand presenting a new belt collection to a department store buyer, the 3D rendering offers several advantages over physical samples. The rendering can show the entire collection in a consistent, professional presentation, with perfect lighting and a clean background. Physical samples can vary in their finish, and photographing them consistently is a challenge. The rendering can show the belt in context, on a virtual mannequin, styled with other pieces from the collection. The rendering can be updated instantly if the buyer requests a change, a different color for a specific retail location, or a modified buckle for a private label program. The digital presentation is portable. The sales team can carry the entire collection on a tablet, rather than hauling heavy sample cases. For online retail, the 3D rendering can serve as the primary product image. It can be used for the main product shot, for the color variation swatches, and for the zoomed-in detail views. The rendering is perfectly consistent across all the colors, with no variation in lighting or angle. The consumer sees a clean, professional presentation. There are limitations. A rendering cannot convey the physical weight of a heavy buckle, the soft hand feel of a premium leather, or the subtle scent of vegetable-tanned hide. For products where these tactile qualities are a critical part of the value proposition, a physical sample is still essential. But for the visual evaluation of design, color, and proportion, 3D rendering has become an accepted and often preferred alternative to physical samples.
Conclusion
The use of 3D rendering in belt design is a transformative technology that has compressed the design and approval timeline from weeks to hours, reduced the cost of sampling by eliminating multiple rounds of physical prototypes, and enabled a level of design exploration that was simply not possible with traditional methods. The 3D model is not just a pretty picture. It is a precise, dimensional representation of the product, built from the same data that will drive the manufacturing process. The materials are not artistic approximations. They are digital twins of the physical leathers and metals, calibrated for physical accuracy. The renderings are not speculative sketches. They are photorealistic visualizations that accurately predict the appearance of the finished product. We have explored the software tools, the CAD programs that create the precise buckle geometry, and the rendering engines that simulate the physics of light. We have examined how materials are digitized, the leather grain and the metal finishes, to create a library of realistic, reusable material presets. And we have discussed how the 3D rendering workflow accelerates the approval process, enabling dozens of design variations to be reviewed in a single session and providing digital assets that can be used for buyer presentations and e-commerce.
At AceAccessory, 3D rendering is a core part of our product development service. Our design studio is equipped with the latest software and hardware. Our 3D designers are skilled in both the technical and the artistic aspects of product visualization. Our material library is comprehensive and growing. We use 3D rendering to collaborate with our clients, to iterate on designs rapidly, and to ensure that the final product matches the client’s vision exactly. We believe that the combination of 3D rendering for speed and physical sampling for final confirmation is the optimal workflow for modern accessories development.
If you are developing a new belt collection and you want to experience the speed, the flexibility, and the creative freedom of 3D rendering, I invite you to contact us. Reach out to our Business Director, Elaine, at elaine@fumaoclothing.com. Tell her about your design concepts and your development timeline. She can arrange a demonstration of our 3D rendering capabilities, show you examples of our work, and discuss how we can use this technology to accelerate your product development. Let us help you see your designs before they are made.