
Sometimes you love the fabric or pattern of a regular hat but not the fit or style—especially if you’re craving something softer, stretchier, or more minimalist. That’s exactly why I started turning unused hats into beanies. With a few tools and a little sewing, you can transform almost any old or oversized hat into a stylish and cozy beanie.
To make a beanie from a regular hat, remove the structured elements, reshape the fabric into a dome, sew the edges, and adjust for fit. It’s a great way to upcycle and personalize your accessories.
Let’s walk through the full DIY process so you can turn that stiff, outdated hat into something snug, slouchy, and cool.
Step-by-Step Guide to Transforming a Regular Hat into a Beanie
You don’t need to be a pro crafter to turn a hat into a beanie. I’ve done it with thrifted baseball caps, oversized winter hats, and even thick t-shirts. The key is removing stiff parts and reshaping the crown for a round, soft silhouette.
The transformation involves removing the brim or structured front, cutting the hat into a rounded shape, sewing a new seam at the top, and folding the edge for a cuff if desired.

How do you turn a regular hat into a beanie without complicated tools?
Step-by-Step Instructions:
- Choose Your Hat: Soft-fabric hats like knit caps or unstructured cotton hats work best
- Remove the Brim or Front Panel: Use a seam ripper or scissors to take off any firm structure
- Cut to Shape: Cut off any extra height and create a curved top edge for a rounded crown
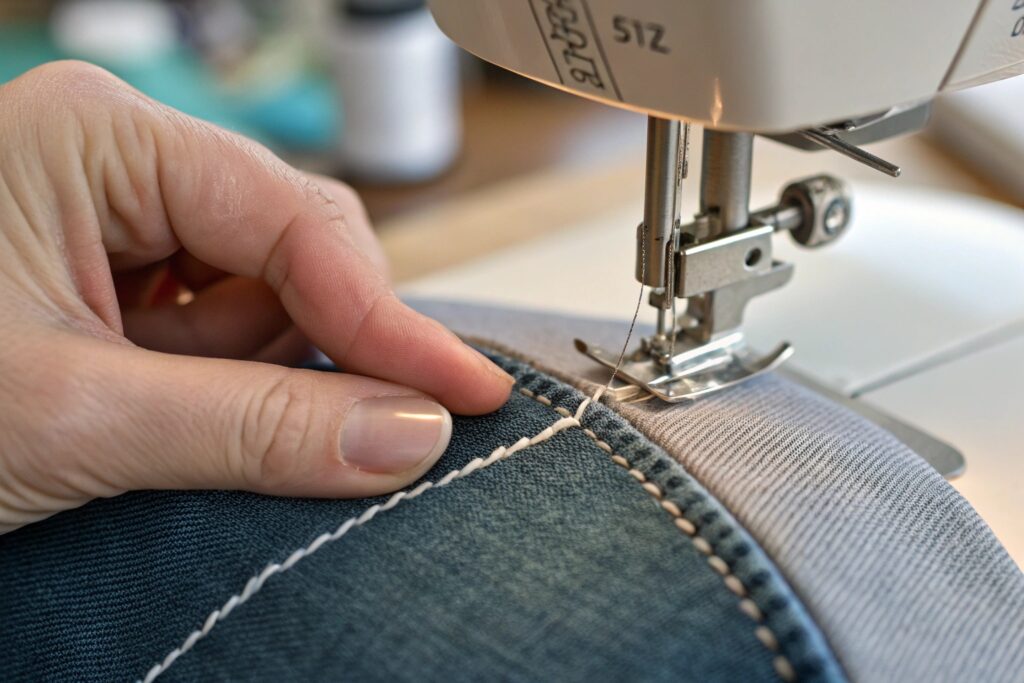
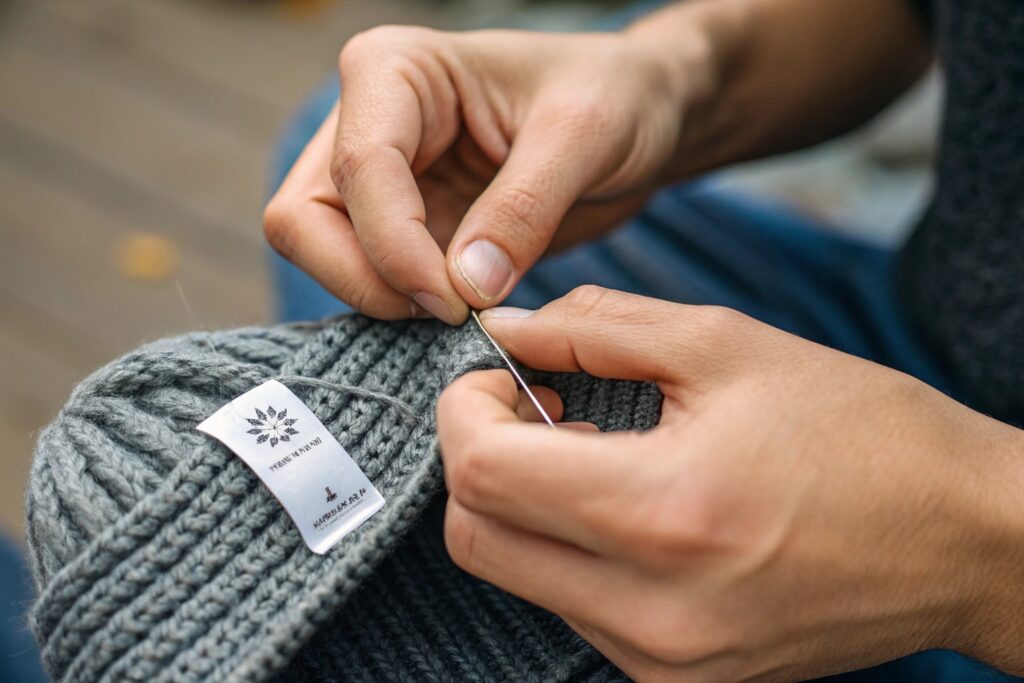
- Sew the Top Seam: Use a simple whipstitch or machine seam to close the top securely
- Hem the Edge (Optional): Fold up the bottom edge for a clean hem or cuff
- Try It On: Adjust the shape or size by trimming or sewing darts if it’s too loose
Bonus Tip:
If using a baseball cap, remove the brim and inner lining, then stitch darts from the edge to center to create a dome shape.
Materials and Tools You Need for Converting a Hat Into a Beanie
Before you start snipping, make sure you have the right materials. I once tried making a beanie with dull scissors and no pins—never again. A few basics go a long way in making the process smooth.
You’ll need fabric scissors, thread or a sewing machine, pins or clips, a seam ripper, and measuring tape. You can also add fleece lining, patches, or elastic for customization.
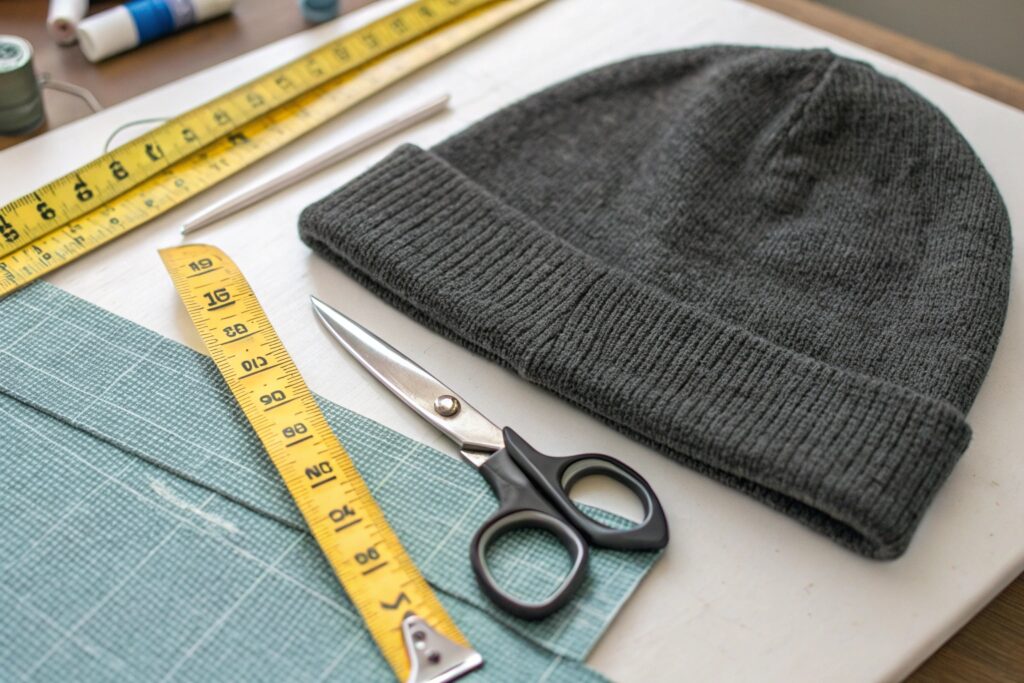
What should you gather before cutting and sewing your beanie?
DIY Hat Conversion Toolkit:
| Item | Purpose |
|---|---|
| Sharp Fabric Scissors | Clean cuts for soft fabrics |
| Sewing Machine or Needle | To close seams (hand sewing is okay) |
| Thread (matching color) | Blends into your hat fabric |
| Pins or Fabric Clips | Holds pieces in place while sewing |
| Seam Ripper | Removes brims or existing stitches |
| Measuring Tape | Ensures even size and cut |
| Fabric Chalk or Marker | Outlines your cut path |
Optional Materials:
- Stretchy lining fabric (fleece or jersey)
- Elastic (for better fit at the base)
- Decorative patch, label, or embroidery
Being prepared means less frustration and a cleaner final result.
Simple Sewing Techniques for Turning a Regular Hat Into a Snug Beanie
You don’t need complex stitching to create a beanie that fits well. I usually stick to just one or two simple stitches, and they’ve worked perfectly on knits, cotton, and blends.
The easiest method is to sew a single curved seam at the top using a whipstitch or backstitch for hand sewing, or a straight stitch with a sewing machine. Use darts to shape it snugly if needed.
What basic sewing skills help create a snug and comfortable beanie?
Recommended Sewing Techniques:
| Stitch Type | Best For | Difficulty Level |
|---|---|---|
| Whipstitch | Hand-sewn edges, stretchy knits | Easy |
| Backstitch | Strong hand-sewn seams | Moderate |
| Straight Stitch | Sewing machine users | Easy to medium |
| Zigzag Stitch | Extra hold on stretchy fabric | Machine only |
Fit Adjustment Tips:
- Add two darts from crown to midline if the hat is too loose
- Use elastic inside the hemline for a fitted base
- For slouchy fits, add 2–3 extra inches of fabric height before sewing
A good fit = a wearable, stylish beanie. The sewing is simple, but the shaping is what makes it look professional.
How to Customize Your DIY Beanie for a Personalized Fit
The best part of making your own beanie? You get to make it truly yours. I love adding personal touches—like contrast thread, custom labels, or even stitching on fabric scraps from old clothes.
To personalize your beanie, you can add labels, patches, embroidery, lining, or decorative stitching to enhance comfort, fit, and style.
What are easy ways to make your upcycled beanie unique and wearable?
Customization Ideas:
| Custom Feature | How to Add It |
|---|---|
| Woven Label | Stitch inside the back seam |
| Iron-On Patch | Press onto front or side panel |
| Embroidery Thread | Add initials or design by hand |
| Contrast Stitching | Use a bold thread color on the seam |
| Fleece Lining | Sew a circular lining to the inside |
| Pom-Pom or Button | Hand-stitch to the top for texture |
Fit Mods:
- Use hidden elastic for a tighter grip
- Sew a folded hem to keep ears extra warm
- Try reversible fabric for a 2-in-1 design
Make your hat as bold or subtle as your style demands—this is the fun part!
Conclusion
Turning a regular hat into a beanie is simple, rewarding, and a smart way to upcycle. With just a few tools, some basic stitches, and a little creativity, you can create a hat that fits perfectly, looks polished, and reflects your personality. Whether it’s a DIY fashion project or a functional fix, this transformation turns something old into something uniquely yours.