Are you staring at a blank page, unsure how to transform a brilliant accessory idea into a technical sample a factory can actually produce? Do you fear the costly back-and-forth of sample revisions because your vision wasn't communicated clearly? You're at the most critical phase of product creation. Designing for development is not just about sketching a beautiful item; it's about creating a precise, actionable blueprint that bridges creative vision and manufacturing reality.
The key is a disciplined, two-track process: Conceptual Design followed by Technical Design. The conceptual phase defines the "what" and "why"—the aesthetics, inspiration, and market fit. The technical phase defines the "how"—the exact materials, dimensions, and construction details in a comprehensive tech pack. Skipping or rushing either phase leads to misinterpretation, wasted time, and budget overruns.
This guide will walk you through a proven, end-to-end methodology. We'll cover how to build a strong conceptual foundation with mood boards and sketches, translate that into a bulletproof technical package (tech pack), select and prepare materials for sampling, and finally, manage the iterative feedback loop with your manufacturer. Let's turn your inspiration into a perfect, producible sample.
How to Build a Strong Conceptual Foundation for Your Sample?
Before a single measurement is taken, you must crystallize your idea. This phase answers: What is this accessory? Who is it for? What does it feel like? A weak concept leads to a confused sample, no matter how good the tech pack is.
Step 1: Define the Core Concept & Target Customer.
Start with a one-sentence brief: "A structured, unisex bucket hat for urban commuters, made from recycled technical fabric with hidden UV protection." This immediately sets parameters. Who is your customer? (e.g., "Ron, 44, values quality and functionality.") Refer back to your ideal customer profile to ensure alignment.
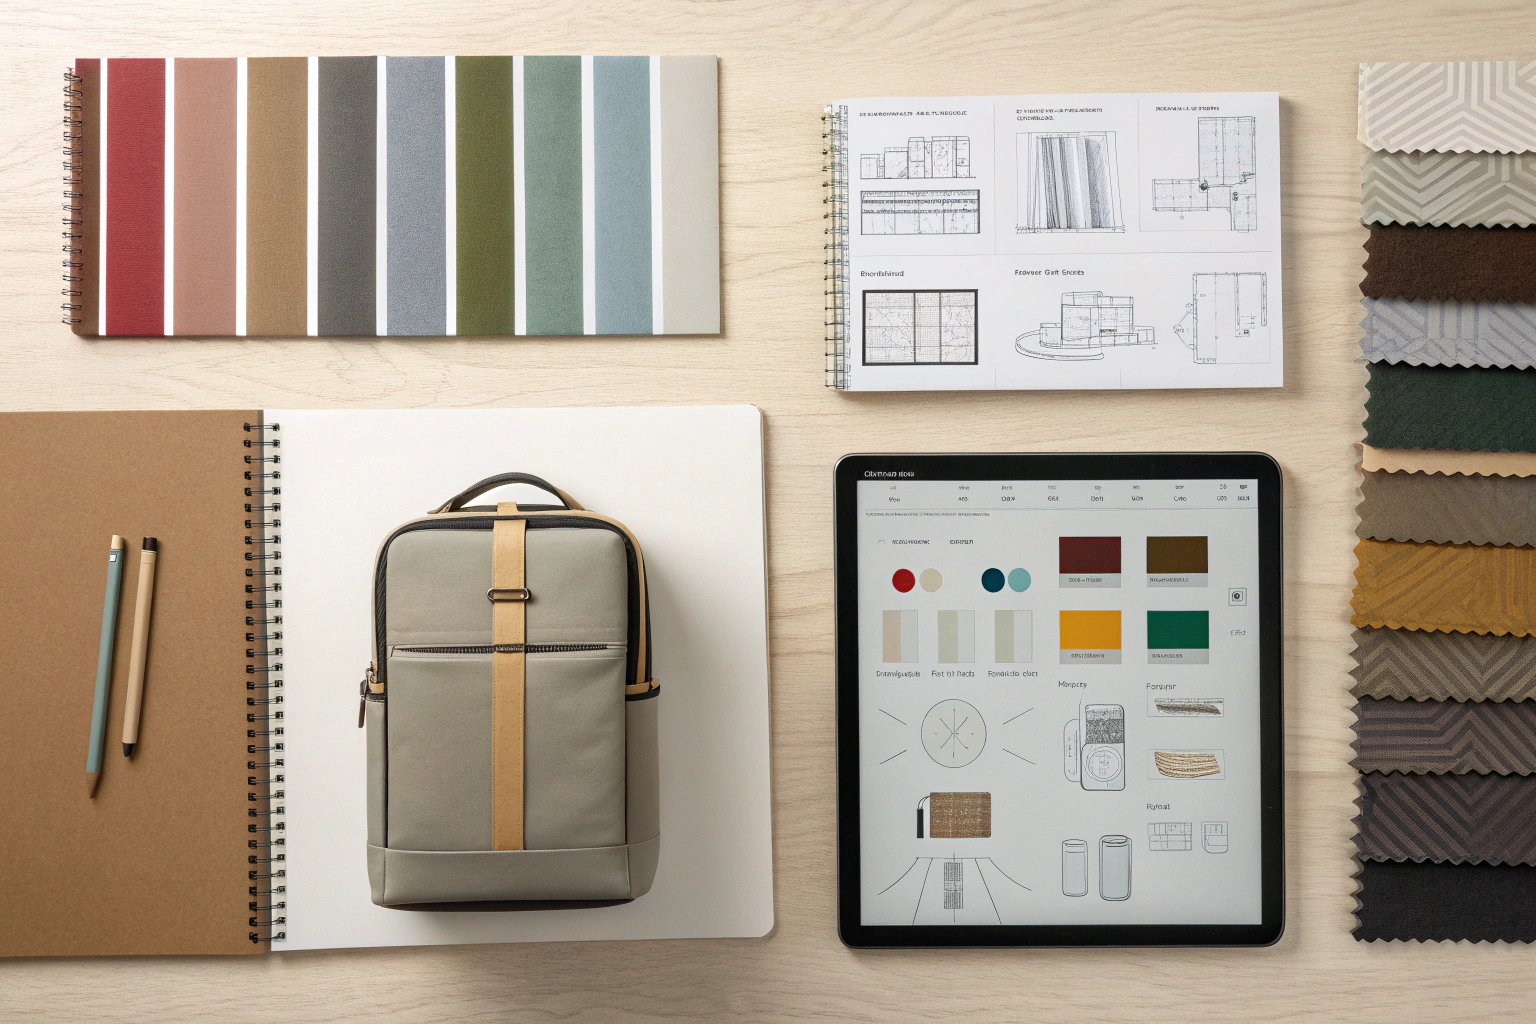
Step 2: Create a Comprehensive Mood Board.
This is your visual North Star. Use a digital tool (Pinterest, Milanote) or a physical board. Include:
- Inspiration Images: Art, architecture, nature, street style.
- Color Palettes: Pull colors from your images. Use a Pantone Fashion + Home Color Guide for accuracy.
- Material & Texture References: Photos of specific fabrics, metals, finishes.
- Competitive Analysis: Images of similar products, noting what you like and dislike.
This board will guide every subsequent decision and is essential for aligning your internal team and your manufacturer.
Step 3: Produce Clear Design Sketches.
Move from abstract to concrete with sketches.
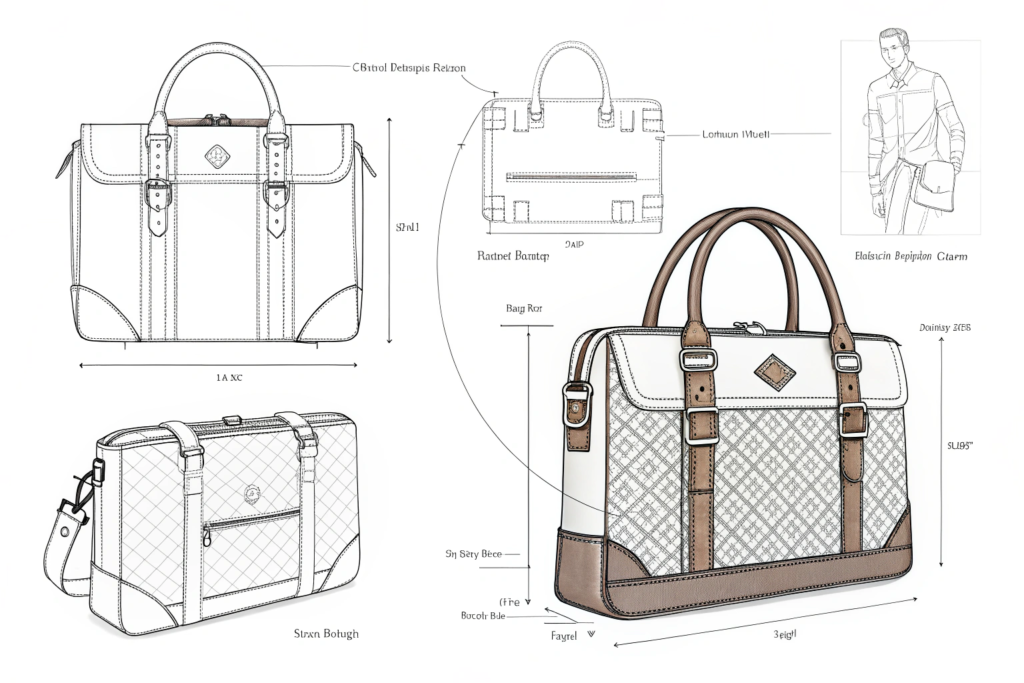
- Style Sketches (Flats): Create clean, front-and-back line drawings of the accessory, showing proportions and key design lines. These should be to scale and show details like stitching, hardware placement, and logos.
- Detail Sketches: Zoom in on any complex areas: how a clasp works, the pattern of a weave, the setting of a stone.
- Context Sketches (Optional): Show the item being worn or styled to convey its intended use and attitude.
How to Create an Effective Mood Board That Guides Development?
A good mood board tells a story, not just shows pretty pictures. Group your images into thematic clusters: one for color, one for material hand-feel, one for silhouette inspiration. Annotate it! Use arrows and notes to explain why an image is relevant: e.g., "This photo's drape is the target for our scarf," or "Use this metal's brushed finish." Share this annotated board with your manufacturer's design team—it provides invaluable context beyond the tech pack and fosters collaborative problem-solving, a hallmark of a true partnership model.
What Are Common Conceptual Pitfalls to Avoid?
- Over-Designing: Adding too many ideas into one product. Edit ruthlessly. One strong concept is better than three weak ones mashed together.
- Ignoring Manufacturability: Dreaming up shapes or details that are impossible or prohibitively expensive to produce at your target price point. Early, high-level consultation with a manufacturer can steer you clear.
- Vague References: Saying "make it luxurious" is meaningless. Point to a specific texture, weight, or finish from your mood board. This precision is the first step toward the material integrity demanded in premium products.
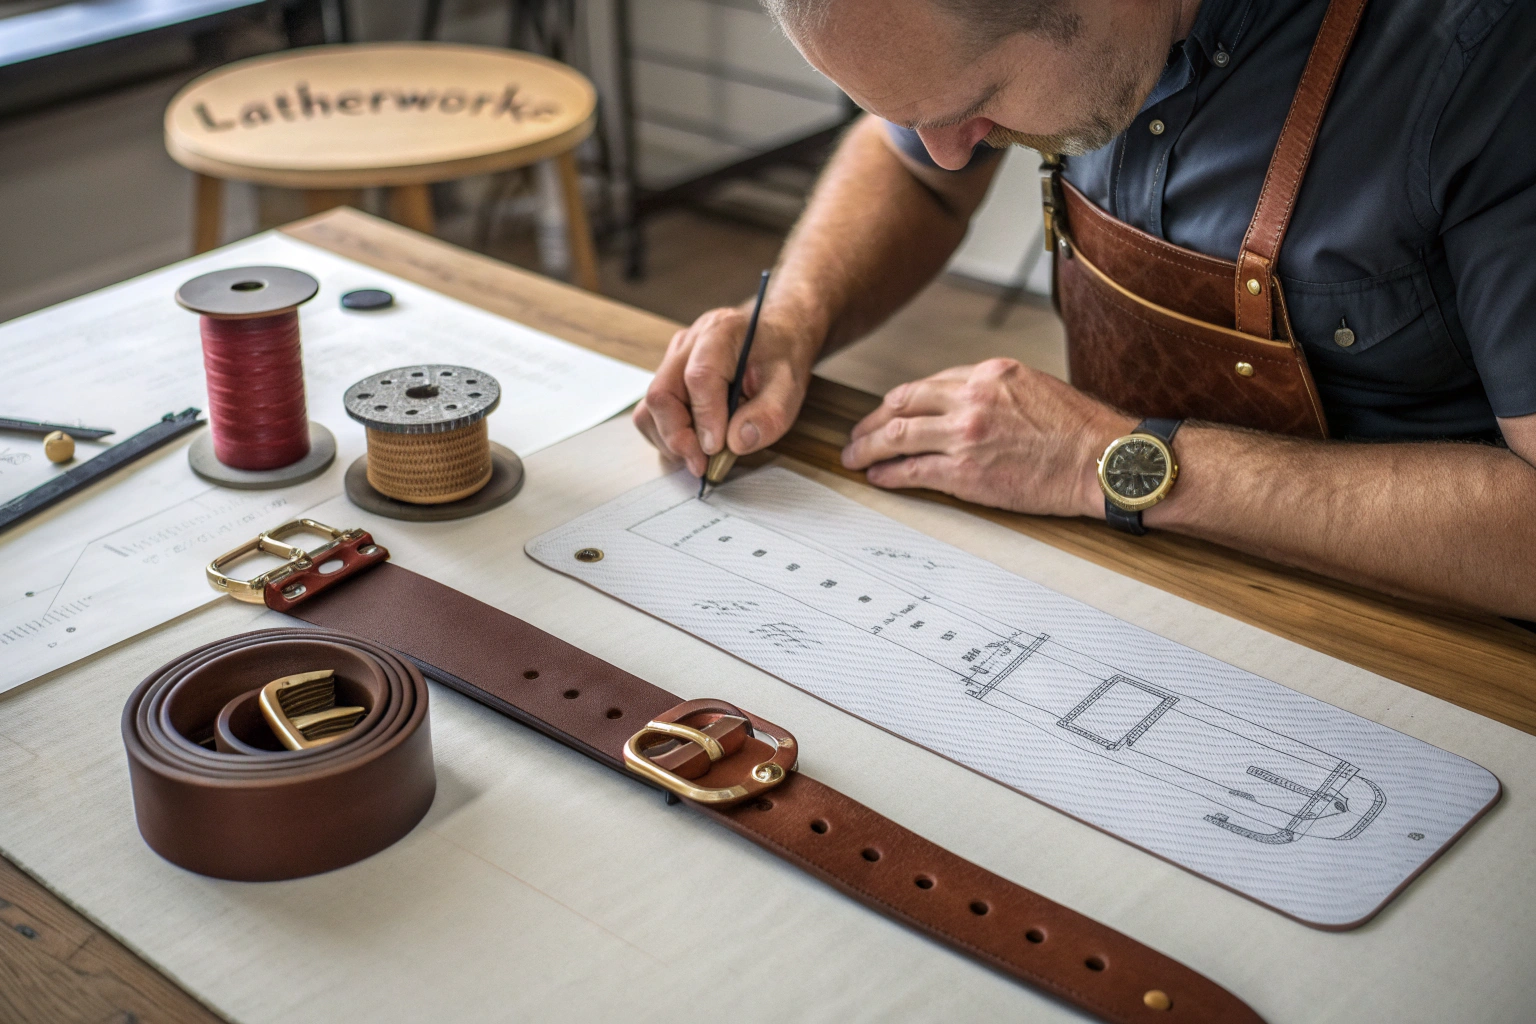
How to Translate Your Concept into a Bulletproof Tech Pack?
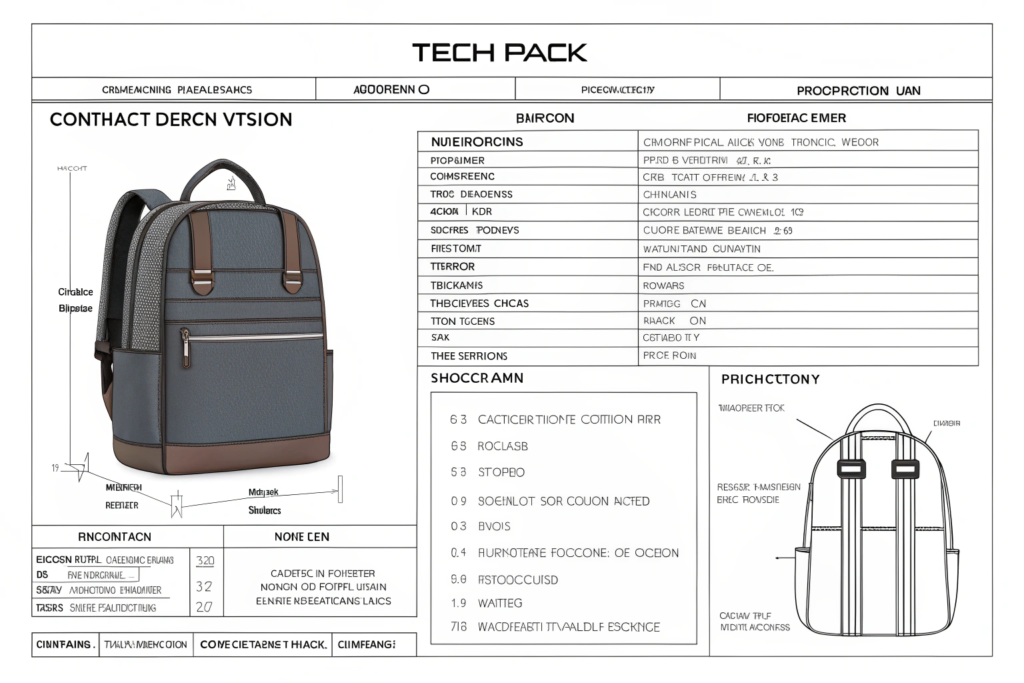
The tech pack is the contract between your design vision and the factory's production line. It must leave zero room for interpretation. A comprehensive tech pack for an accessory includes the following core components:
1. Cover Page & Spec Sheet:
- Product name, style number, season, brand.
- Target MSRP and cost target.
- Key description and inspiration notes.
2. Technical Flats & Drawings:
- Orthographic Views: Professionally drawn front, back, side, and top views, perfectly to scale.
- Callouts with Dimensions: Every critical measurement (in both inches and millimeters) should be clearly indicated with leader lines. E.g., brim width, scarf length/width, bag strap drop.
- Construction Details: Close-up drawings of seams, pleats, folds, hardware attachment points.
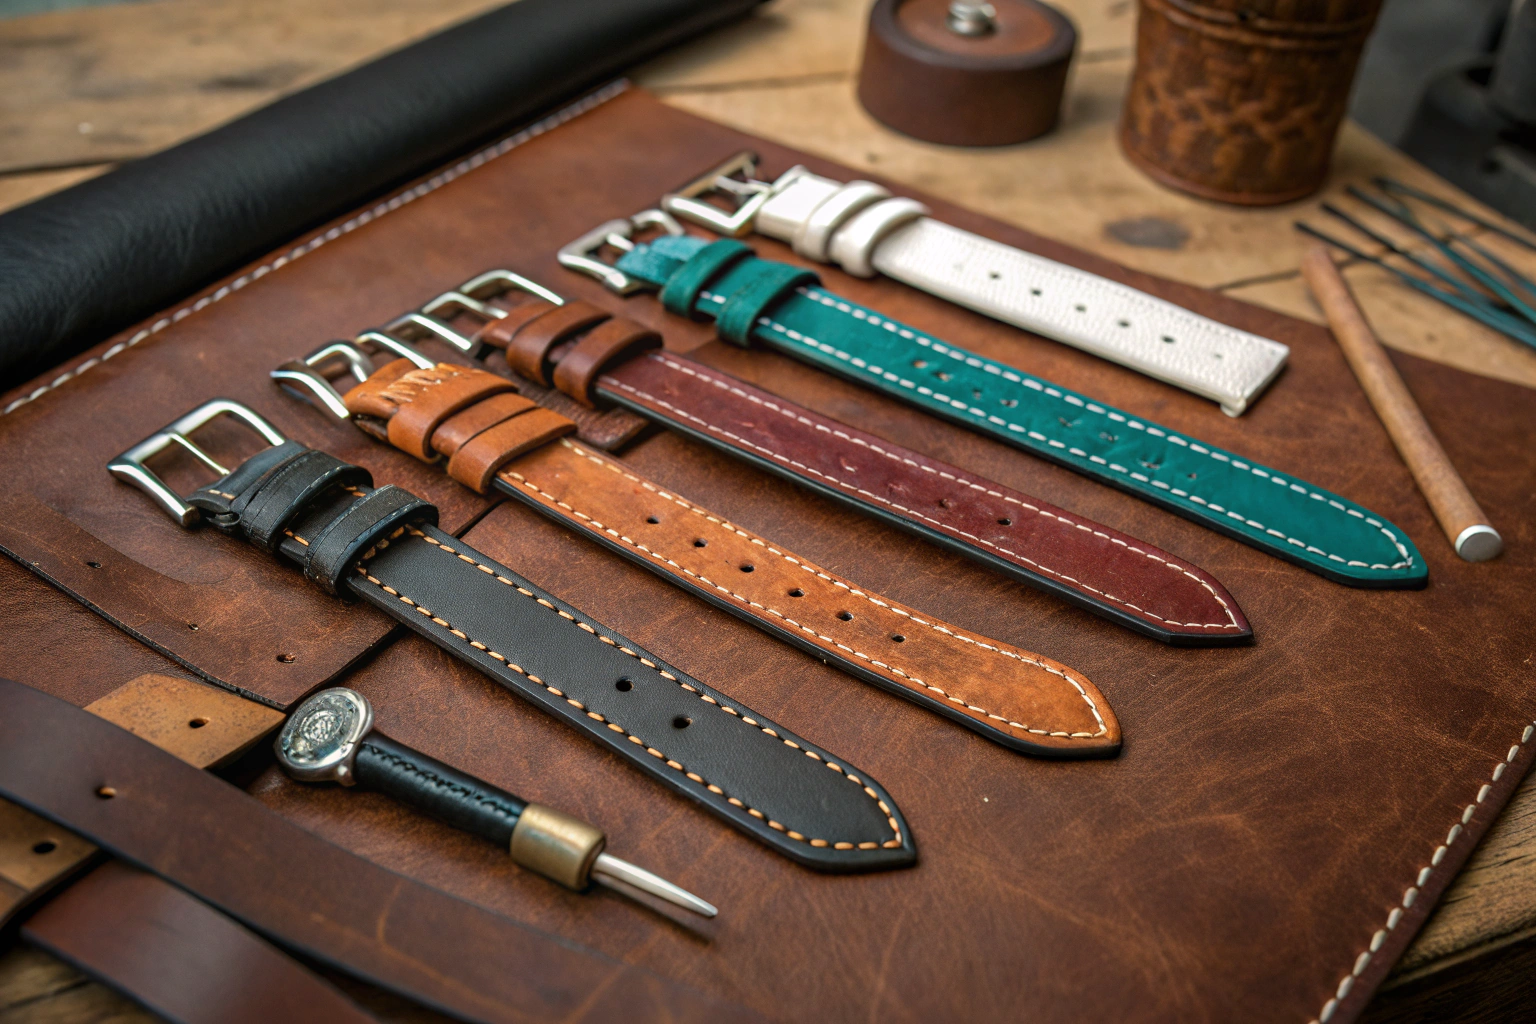
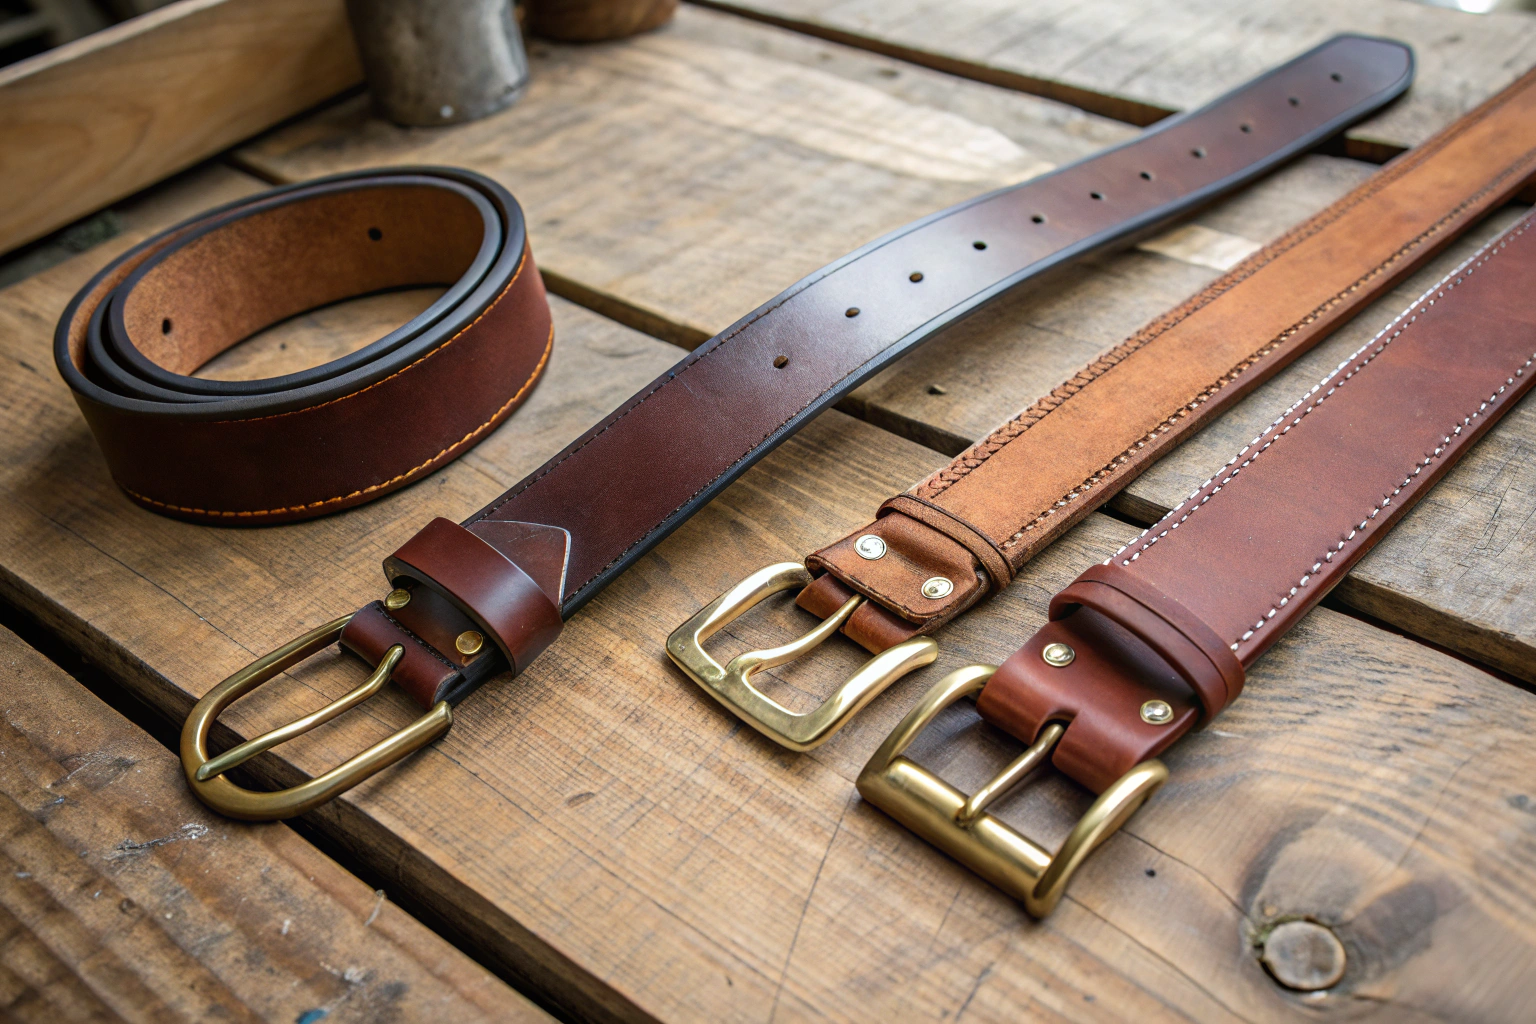
3. Bill of Materials (BOM):
- A numbered, itemized list of every single component. This is non-negotiable.
- For each component, specify: Material, Composition, Supplier/Reference, Color, Finish, and Quantity. Example: "1. Main Fabric: 230T Polyester Pongee, 110gsm, Color: Pantone 19-4052 TCX (Classic Blue)."
4. Color & Trim Specs:
- Physical Color Standards: Attach actual Pantone swatches, lab-dips (fabric), or dyed leather/plastic chips.
- Hardware Specs: Detailed drawings or photos of buckles, clips, zippers, including finish (e.g., "Antique Brass PVD plating, 2µm thickness").
5. Packaging & Labeling Instructions:
- How should the final product be packaged? (Polybag, card, box).
- Artwork for labels, hangtags, and care labels.
Why is a Detailed BOM the Most Important Part of the Tech Pack?
The BOM prevents 90% of sampling errors. If you simply write "gold metal clip," the factory will use the cheapest gold-colored clip they have. Your BOM must specify: "Clip: Brass Alloy C2600, 18K Gold PVD plating (2µm min), 25mm length, 8mm width, spring hinge. Reference: Supplier ABC, Part #GCL-225B." This level of detail ensures quality and consistency. It's the same rigor required when specifying components for durable goods.
How to Source and Specify Materials for the Tech Pack?
Do not write "TBD" in your BOM.
- Work with Your Manufacturer: A good partner like Shanghai Fumao Clothing will provide material libraries or source options based on your concept and cost target.
- Request Physical Swatches: Before finalizing the tech pack, get physical swatches of the proposed fabrics, leather, threads, and hardware finishes. Approve these and reference them in the BOM.
- Consider Testing: For performance items (water resistance, UV protection), note any required testing standards in the tech pack. This proactive step mirrors the approach for verifying fabric performance.
How to Prepare and Submit for the First Sample?
With your tech pack complete, you're ready to initiate the sampling process. This is a collaborative phase with your manufacturer, not a "set it and forget it" order.
Step 1: The Kick-off Meeting.
Schedule a call with your factory project manager and their technical team. Walk them through your mood board, sketches, and every page of the tech pack. This ensures they understand the intent, not just the specs. Discuss potential challenges and agree on a timeline.
Step 2: Provide All Reference Materials.
Send the factory a digital package containing:
- High-resolution PDF of the full tech pack.
- Separate high-res images of all flats and drawings.
- Photos of your mood board and inspiration.
- Physically mail your approved material swatches and color standards. This is crucial.
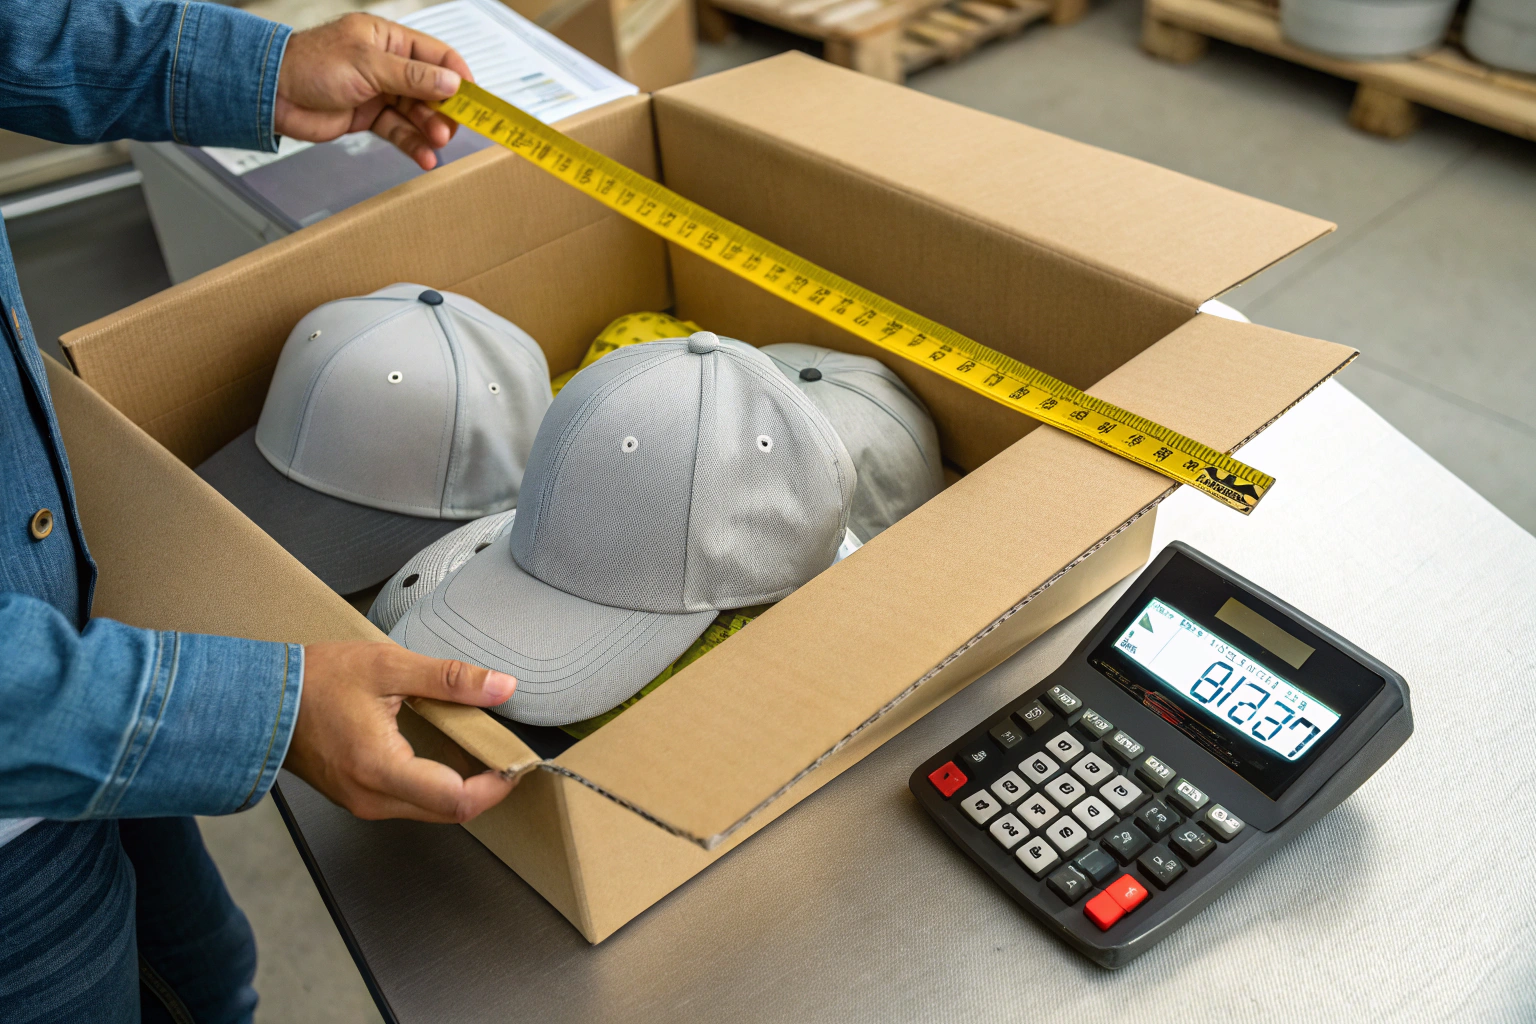
Step 3: Agree on Sample Costs and Timelines.
Sample development has costs (labor, material setup). Get a quote for the first sample (proto sample). Agree on a realistic timeline—typically 2-4 weeks depending on complexity. Pay the sample fee promptly to start the clock.
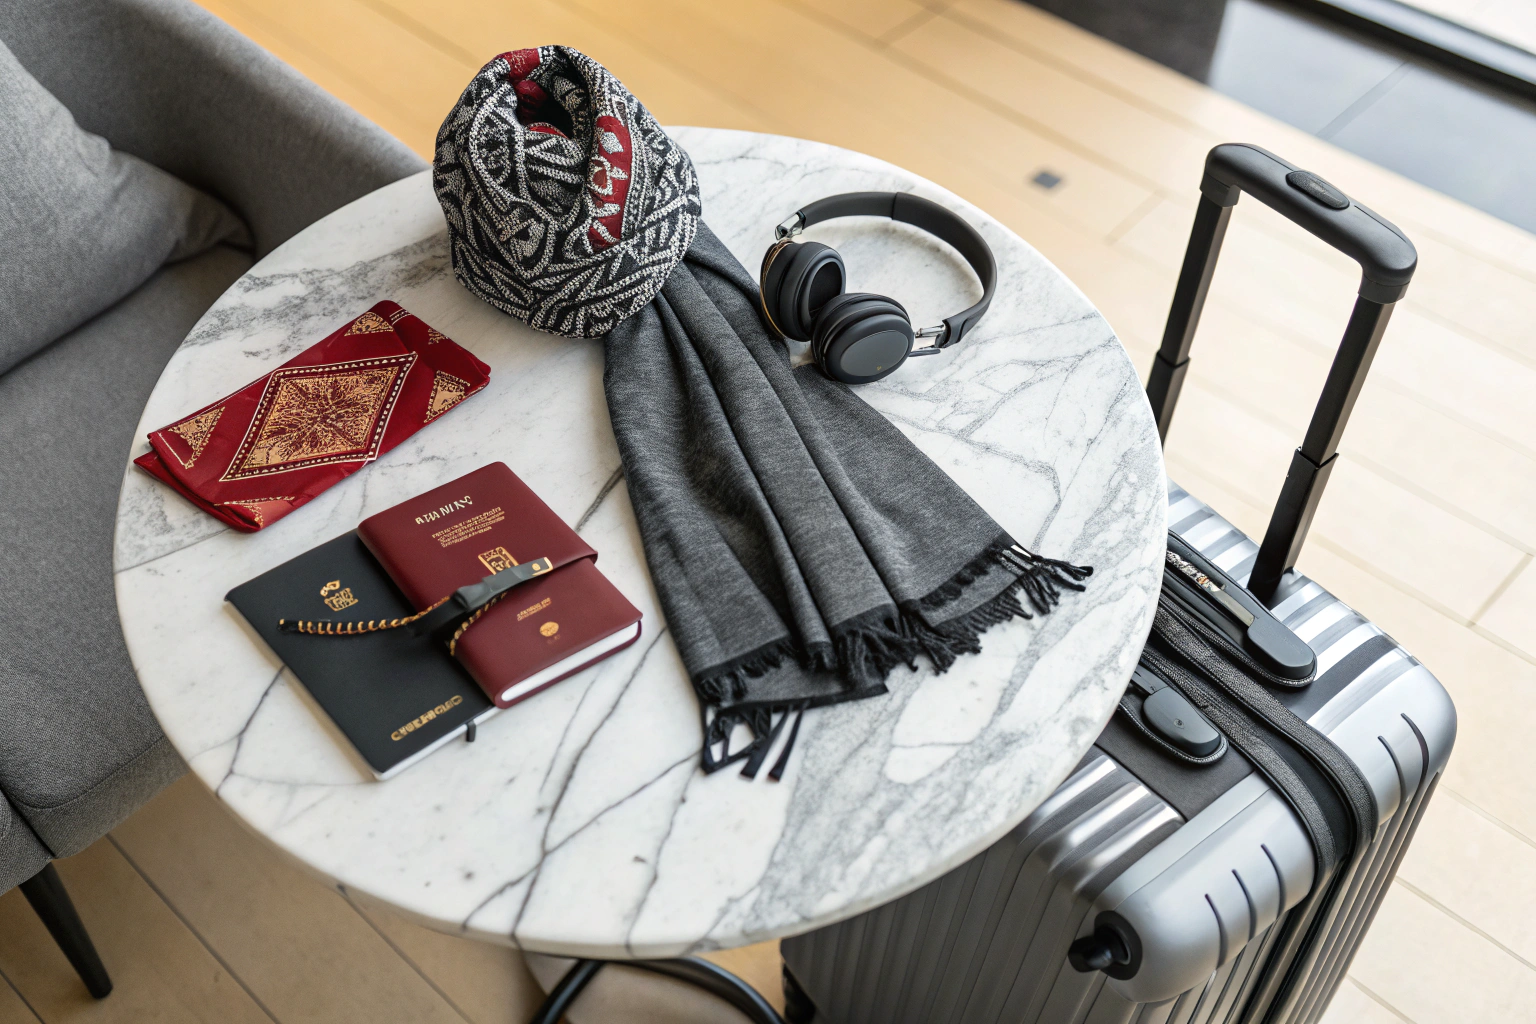
![]()
What Should You Expect in a Proto (First) Sample?
The first sample is a proof of concept. It is made to test the design, proportions, and basic construction. Do not expect perfection. It will likely have issues: the wrong weight of material, a slightly off-color, a stiff hinge. Its purpose is to give you something physical to evaluate against your vision. This is where the real work of refinement begins.
How to Communicate Effectively with the Factory During Sampling?
Be specific and objective in your feedback. Instead of "The hat looks cheap," say: "The brim is floppier than intended. Please increase the interfacing weight from 80gsm to 120gsm per page 4 of the tech pack." Use photo markups: take pictures of the sample, circle areas of concern, and annotate directly on the image. This visual feedback is unambiguous and prevents misunderstandings, building the clear communication vital for success.
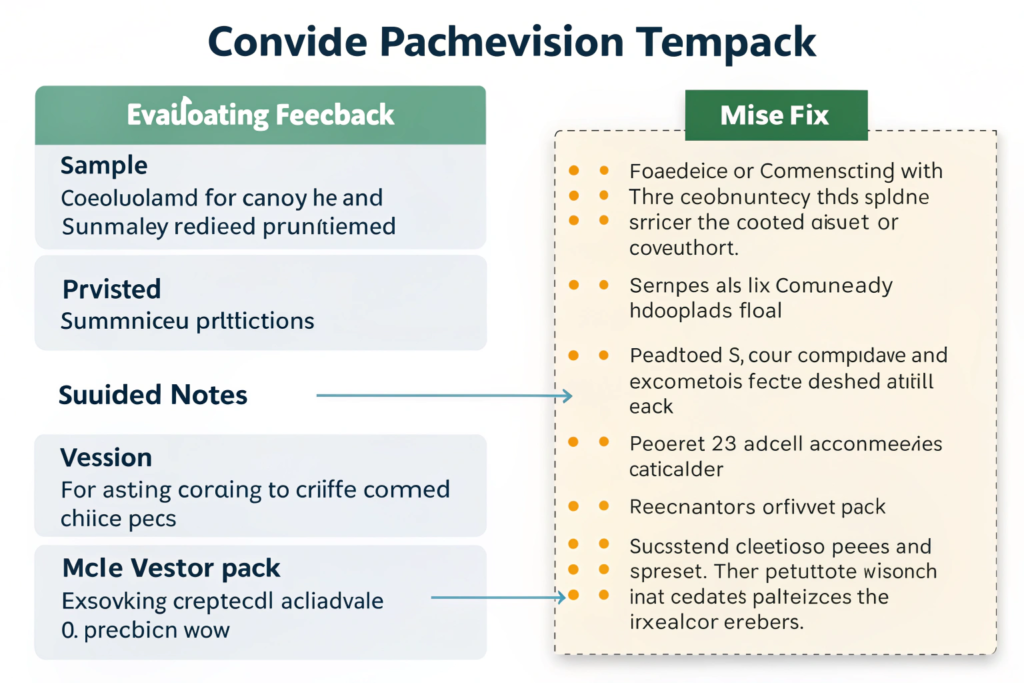
How to Manage the Iterative Feedback and Approval Loop?
Sampling is iterative. The path from a rough proto sample to an approved pre-production (PP) sample typically requires 2-3 rounds. Managing this loop efficiently saves time and money.
The Sampling Cycle:
- Evaluate the Sample: Conduct a rigorous side-by-side comparison with your tech pack and approved materials. Test functionality (open/close clasps, wear the item).
- Document Feedback: Create a single, consolidated feedback document with clear bullet points and photo markups. Categorize comments: Critical (must fix), Major (should fix), Minor (nice to fix).
- Submit Feedback & Revised Specs: Send your feedback document to the factory. If a spec needs to change (e.g., a dimension), issue a revised tech pack page with a new version number.
- Factory Revises & Resubmits: The factory makes corrections and produces a new sample.
- Repeat Until Approval: The sample is approved only when it matches all critical and major specs. This becomes your "Golden Sample"—the absolute standard for mass production.
When is a Sample Ready for Mass Production Approval?
A sample is ready for production when it becomes the Pre-Production (PP) Sample. This sample must be:
- Made with the exact, bulk-approved materials (from the correct dye lots).
- Constructed using the final production methods.
- A perfect representation of the design, fit, and function.
You approve this sample by signing a sample approval form or sending a formal approval email. This approved PP sample is then used as the master for all quality control inspections.
How Many Sample Rounds Are Reasonable?
Budget for 2-4 rounds as standard. Round 1 addresses major design/construction flaws. Round 2 refines fit and details. Round 3 is for final tweaks. More than 4 rounds often indicates a poorly defined initial tech pack or a factory with capability issues. Each round has a cost and time impact, so thorough upfront work in the conceptual and tech pack phases is the best investment you can make.
Conclusion
Designing new accessory samples for development is a structured dance between creativity and precision. By building a strong conceptual foundation, translating it into an unambiguous tech pack, preparing materials meticulously, and managing the sampling loop with clear, documented feedback, you transform your vision into a tangible, producible product.
This disciplined approach minimizes costly errors, accelerates time-to-market, and establishes a professional, collaborative relationship with your manufacturer. It turns the often-frustrating sampling process into a powerful tool for innovation and quality assurance.
Ready to streamline your accessory development with expert guidance? At Shanghai Fumao Clothing, our in-house design and project management team specializes in guiding brands from concept to approved sample. We help create actionable tech packs, source materials, and manage the iterative sampling process efficiently. Contact our Business Director Elaine at elaine@fumaoclothing.com to develop your next best-seller.